
Kombis T1-T2
Microbus – Better Than Ever
Turbo Type 4 Project
Our Kombi Camper Story
The Brown Bomber
All About Kombis
Kombi Models
Kombi Dos and Don’ts
Living With A VW Kombi Camper
Travellers’ Troubles
Confusion
Tuning Tips for Twin-Carb Kombis
VW Type 2 Station Wagon
Independent Thought
Driving the new 1700 VW Commercial
Replacing Type 4 Kombi pushrod seals
VW Transporter/Caravelle buyers guide
The Kruizinwagon
Mike Said’s 1978 Kombi
Joe’s Camper
Last air-cooled VW Bus
Leigh and Belinda’s 1977 Microbus
Microbus – Better Than Ever
From the Daily Mirror (1977)
December 1985
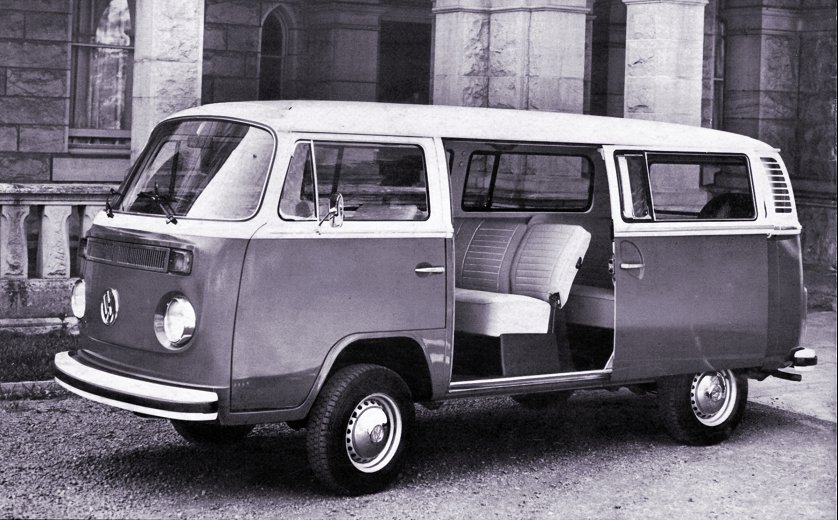
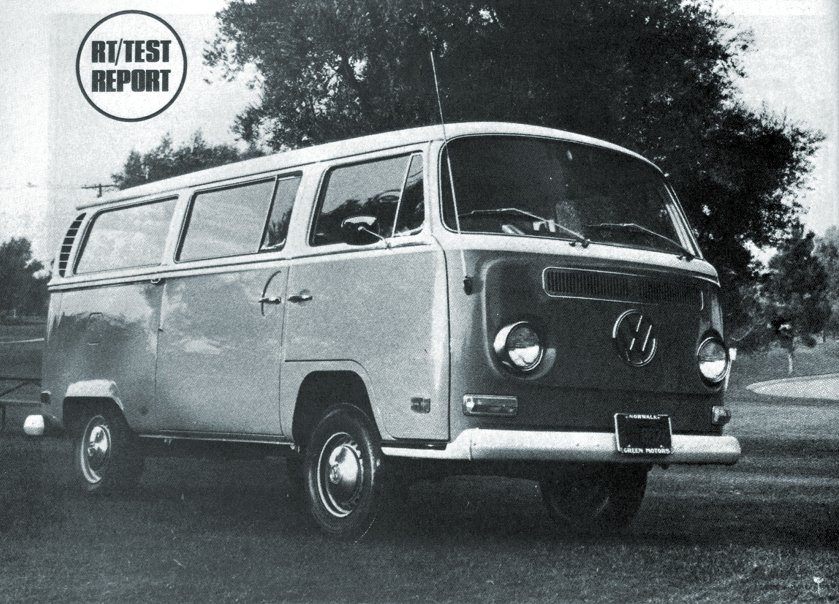
Eight’s a crowd…except in Volkswagen’s versatile Microbus. With three rows of seats, it makes provision for eight occupants, large or small, with room to spare for gear.
The Kombi-based Microbus is truly a vehicle of a hundred and one uses, ideal for pleasure and business. First and foremost for large families, it offers many advantages over a conventional car, which at best can safely accommodate six people. It gives the kind of mobility they could not otherwise enjoy, albeit at a higher cost than an average car.
Anyone who takes children or members of social and sporting clubs for occasional outings must also be potential buyers. And, it is an excellent proposition for commercial purposes, either ferrying people around or, with the rear seats removed, carrying goods of all descriptions.
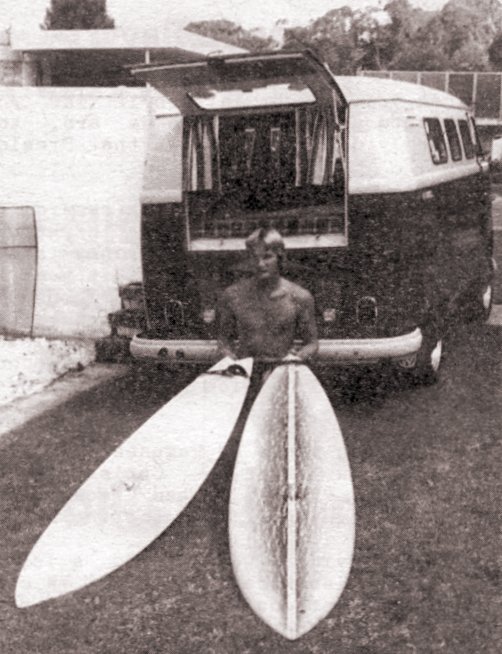
Finally, the Microbus lends itself admirably to recreational purposes, being adaptable for elementary camping and having adequate space for surfboards and the like.
Considering this flexibility, besides the fact it is now fully imported from Germany, the prices - $8,996 and $9,696 for the respective manual and automatic versions – are quite realistic.
Volkswagen has sold the staggering number of 4.5 million Kombis throughout the world since 1950. The Microbus, launched in 1954, has accounted for more than a million of these. Its popularity has shown no signs of slackening, despite the fact that there have been few changes to the original concept.
I enjoyed a week’s test of a smart two-tone blue and white unit supplied by LNC Industries, Volkswagen’s Australian distributors. The latest 2-litre version has ample performance, coupled with the Kombi’s characteristically supple ride and a much greater margin of driving safety than possessed by earlier models.
Disc front brakes and radial-ply tyres are standard, while the much-improved suspension counteracts the traditional difficulty of handling the vehicle in high winds. This can be described as trying to keep a small boat in a choppy sea, for the high and wide Microbus tends to be blown off course. But it improves with acquaintance and does have certain benefits over a car from a drivers point of view, including commanding vision which really helps your progress in traffic.
Features that make the Microbus so practical include the large side-opening door, a walkway between the front bucket seats and first rear bench seat, a rear hatchback and a big luggage compartment. The flow-through ventilation system is ineffective for Australian conditions and the gear change takes a while to muster. But everything else is functional and the finish is first class with heavy-duty vinyl upholstery, rubber floor mats, rubber bumper strips and a smart safety grille protecting the rear window from being broken accidentally.
Last but not least, the Microbus is very much at home off the beaten track, taking rough roads into its stride thanks to its long wheelbase, wide track and all independent suspension.
In 23 years, it hasn’t looked like going out of fashion, and undoubtedly will be around for many years to come unless someone devises an even more versatile vehicle.
Turbo Type 4 Project
By Michael Schymitzek
February 1987
I've heard a lot of talk amongst members of Club VW over the past few months about the ‘Blue Turbo Kombi’, most of it inaccurate and wildly exaggerated. So, I thought it about time to write a few words informing fellow VW enthusiasts about my turbo project, what motivated me to start it, and what problems I encountered along the way. First a little history...
Four years ago I parted with $4,600 hard-earned dollars to become the proud owner of a '77 2-litre Kombi. Prior to this Kombi I had owned 3 Beetles and 2 Fastbacks. The usefulness of the Kombi over a sedan-type car soon became apparent; for towing, carting large loads or camping, it just can't be beat.
I bought it with just 97,000 km on the clock (just run in) and reconditioned the motor for the first time after 220,000 km. Twelve months ago, with 330,000 km up, I decided it was time to do something to upgrade the powerplant, mainly because of the Japanese vans, which are getting quicker all the time, beating me up hills. I travel 1000 km a week and the Kombi is my sole means of transport, so any modifications I made to give me a substantial increase in power would still have to retain the same level of reliability as that of the standard engine.
Several other considerations came to mind:
• Fuel economy mustn't suffer appreciably or my weekly fuel bill would skyrocket due to the high mileage I cover.
• Low-speed driveability must be retained as I drive a lot in traffic - therefore no wild cam angles.
• The motor mustn't be noisy inside or out, as I can't stand a lot of induction or exhaust noise on a long trip.
Several options which would fulfil these requirements were open to me:
1. Fit a non-VW engine that in standard form has a high power output in comparison to the VW engine, eg. Mazda rotary, Datsun 2-litre, V6 Capri - but I'd prefer to stay with something VW.
2. Fit a Porsche motor - not really feasible as parts price and availability, not to mention initial purchase price, make this an unattractive proposition.
3. Turbocharge the 2-litre Kombi motor - this fulfils all of the guidelines and it's something I've wanted to have a go at for years.
Having decided on the turbo project I bought a burnt-out 2-litre Kombi motor from a wrecker for $100. It was really burnt - even the crankcase had started to melt. Beneath the burnt exterior I managed to salvage a crankshaft, 4 conrods, camshaft, lifters, fly-wheel, cylinder heads and several pieces of tinware. Not bad for $100! As I work at a VW specialist shop I was able to pick up most of the other parts for practically no cost and I even got a crankcase for free - it just had a small hole in the top where it had lost a conrod but the local technical college welded it up for free.
Apart from the normal reconditioning and balancing I shot-peened the crank and rods. I retained the standard camshaft, as a turbo can get by with modest valve timing and I wasn't looking for super-high revs. Cooling came next - starting with 4 oil squirter jets extending through the top of the crankcase to squirt oil up under the piston temperature under boost conditions. I also designed and built a control valve which only delivers oil to the piston squirters when oil pressure exceed 25 psi - in other words, anything above idle. This helps keep oil pressure up and maintains a good supply to the turbocharger bearings, even at low revs.
I lowered the compression from the standard 7.5:1 to 6.9:1. With a low boost set-up this isn't really necessary but I was planning to run in the neighbourhood of 12 pounds boost. I left the heads fairly standard, just cleaning up the castings of the combustion chambers and ports, and CC'd the chambers to within 0.5 cm3. I sank the valves a little in the seats to promote better flow and weaken the over-strong valve springs that these motors are fitted with. Of course, a 3-angle valve job was done to finish the heads.
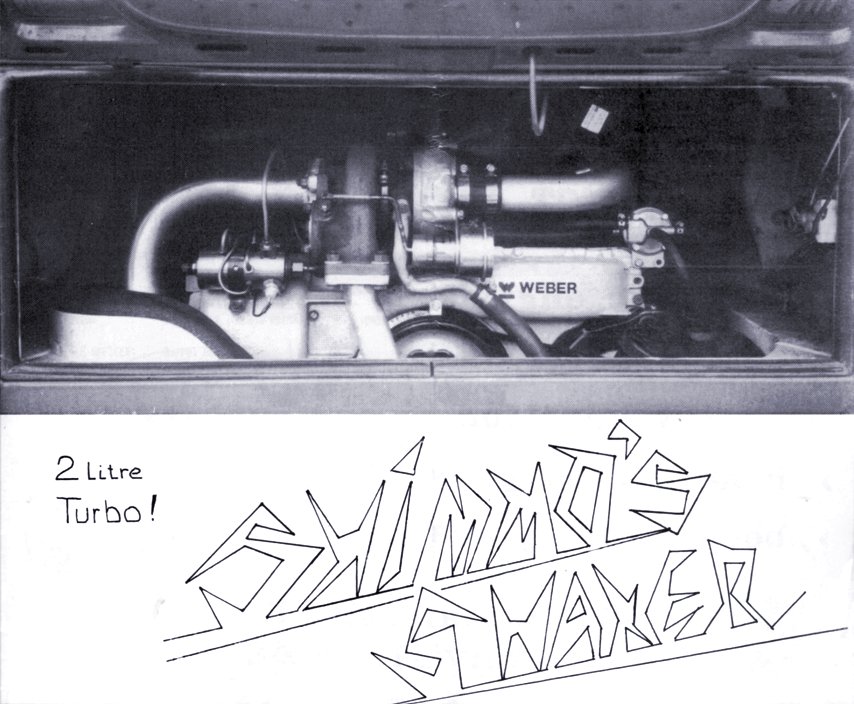
I threw the terrible original VW head gaskets away and had a machinist mate of mine make me a set out of copper. With the basic engine assembled, next came the fun part - building an induction and exhaust system. I was using a Mitsubishi Starion turbocharger with integral wastegate for easy boost adjustment. I was lucky to acquire this unit cheap a couple of years ago when I worked for Mitsubishi. I built an exhaust system out of a set of Sonic extractors, which I dissected, re-built and ducted up to the turbocharger. From the turbo out I used 2¼" pipe running through a small Lukey tractor muffler.
I made the inlet manifolds out of the manifolds that came with a fuel-injected Kombi motor. I welded a flange on top of the manifold box to which I bolted the Weber DMTT carburettor - a carby made by Weber especially for blow-through turbo installations. I fitted a plate-type oil cooler running through an oil thermostat and a heat shield around the hot side of the turbo to prevent superheating the air in the engine bay prior to it being drawn in by the engine cooling fan. The oil cooler and heat shield are both force-fed cold air. The original engine thermostat and flaps are still used, of course, since they are essential in Type 4 engines.
I modified a vacuum-advance unit off a late-model "pollution-controlled" Kombi engine and bolted it to the normal 2-litre Kombi distributor to advance the timing under cruise conditions to give good fuel economy and retard the timing 16 degrees under full boost to prevent detonation. I used an electric fuel pump off a fuel-injected Type 3 and a boost-sensitive pressure regulator to supply the carby with fuel and raise fuel pressure proportional to boost pressure. I still utilised the 228 mm 2-litre Kombi clutch, which is more than adequate as long as you don't want to do burnout starts - which is something I never do anyway.
After half a day fitting the engine it was finally ready to start. It fired up instantly and idled smoothly, which was a welcome reward after 8 months of intensive work.
The first thing that struck me was the incredible smoothness and quietness in comparison to the standard motor. I knew that turbo motors were inherently quiet due to the turbine wheel chopping up the exhaust pulses but it really surpassed my expectations - it was quieter than the standard motor. After a couple of hundred kilometres running in I gave it the first boot in the go department. Christ Almighty! That's what 12 psi boost feels like on a 2013 cm3 motor!
It accelerated like a V8! Totally intoxicated with the power, I drove a little radically the first week but soon mellowed down and saved my demonstration of brut force for only the most deserving of vehicles - like fuel-injected 2.2-litre Taragos and 6-cylinder Commodores. These vehicles just aren't a match for the Kombi and burning them off is becoming a bore. With all the extras my Kombi is fitted with, including heavy bull bars, the Kombi weighs in at 1.8 tonnes! Therefore it doesn't leave the line too hard, as there is a lot of inertia to overcome. But when it hits 60km/h watch out, it takes off! Surprisingly it is very revvy. It winds easily to 5800rpm before tapering off but I usually only take it to 5000 as the crankshaft isn't counterweighted. Speeds in gears are great at 50km/h in 1st, 128 in 3rd and a true 175 in top on a flat road without wind assistance - not bad for a car that has the same aerodynamics as the side of a barn.
Cruising at around 120km/h, fuel economy is like the standard motor at 11.8 L/100km (24 mpg), but driving hard does take it down to as low as 18.8 L/100km (15 mpg). After 15,000 km of hard driving an exhaust leak started at the right-hand cylinder head, so I pulled the motor out and stripped it to asses the effect of turbo-charging on all the vital components.
The bottom end was totally unmarked, which I expect as Type 4 engines are pretty indestructible in this department. Pistons and cylinders were also perfect - the oil squirters really did their job in keeping the pistons cool. The head gaskets on the right hand side were burnt, thus the exhaust leak. The weak point in the system is that the cylinder heads can't cope with the high thermal load of running under 12 psi boost for long periods. I'm working on water-cooling a pair of heads now, which should remedy this weak point, but in the mean time I've re-built the motor using 1800 heads which have larger valves and ports than the 2-litre heads I used before, and it does perform even better.
At present the turbo is running strong and sweet, and watching the expression on the faces of drivers of Japanese tin boxes and even a lot of sedan cars as I power past them on the hills is worth all the time and effort that went into the project. The all-up cost to date is $1500, which isn't bad considering that's what it costs to recondition a standard 2-litre Kombi motor.
I'll write another turbo report when I get a few more kilometres up on it. What's in the future?
Water-cooled heads, fuel-injection, 16 psi boost and a warmer camshaft, which all adds up to 7000rpm and 340 Nm of torque - enough for any Kombi!
Our Kombi Camper Story
By Les Robinson
February 1987
Early in June 1985 my son David and I decided to trade in the 1500 Beetle on a Kombi Camper Van. After looking all day one Saturday, we sighted a pop-top camper in a sale yard on Parramatta Road. A deal was reached for the trade-in and delivery was taken of the vehicle.
The Kombi had no registration sticker and when I enquired about this, the salesman said a window had been broken and when the transfer of registration was effected, a new sticker could be obtained. I applied for transfer of the registration and was told by the D.M.T. that the vehicle had not been registered for two years and had been on consignment to five different sale yards from a company in Newcastle.
My immediate reaction was to confront the sales people, who denied all knowledge of the matter. Consumer Affairs was the next step. They said they would send an inspector to interview the people concerned. A few weeks later I was told to go back to the car yard and collect one third of the annual registration fee. A cheque was paid into my account and a short time later the bank notified me that the cheque had been dishonoured. Consumer Affairs was contacted again and after more threats a cheque for $85-00 was finally received.
The Kombi was completely stripped down mechanically and the motor, gearbox, brakes and steering were all reconditioned. This vehicle had been driven near the seashore and had surface rust over everything on the underside, which required two coats of fish oil to neutralise the rust. After four months of work and some outlay of cash, the Kombi was ready to be taken over to the D.M.T. at Chullora for inspection.
The Kombi is a factory-built camper with a fibreglass pop-top, bed and cupboards. The stove and fridge had been removed. The inspector knocked the vehicle back for registration because of no stove and fridge, the inertia reel seat belts not being secured solidly, and no specification number for the pop-top. After numerous enquiries, it was ascertained that the fibreglass top had been manufactured by a South Australian company called Sopru Conversions, based at Auburn N.S.W., who went out of business in the early 1980s. They had been Volkswagen Australia’s ‘official’ Campmobile conversion company during the 1970s.

A stove and fridge were purchased, the belts strengthened, and after consulting the Yellow Pages, a trip was made to a company in Chatswood doing Kombi conversions. A tale was told about the Kombi having been converted by this company a few years previously, and could I possibly obtain the specification number for re-registration examination of the camper van. I was told in no uncertain terms by a girl in the office that the Kombi would have to be inspected by them. My problem was that I couldn't get the vehicle registered because of no specification number, but I was unable to drive the vehicle to Chatswood, because the vehicle was unregistered.
A decision was made to submit the Kombi for another try at Chullora. Upon its presentation with the appropriate forms to a different inspector, it was passed as roadworthy. The only comment made about the pop top was that he didn't consider it important!
The Brown Bomber
By Greg Figgis
March 1990
Having had Volkswagens in our family since the early '60s and being involved with them in our business, I guess it was only natural that one day I too would be the proud owner of a VW. My first car however was an EJ Holden, but I was soon dissatisfied with its poor body water sealing. Every time it rained, the car filled up with water, even though it was a one owner and in immaculate condition.
I soon sold the Holden and spotted a 1960 Kombi Panel Van for sale in the paper at Chatswood. It had been driven back from Western Australia and the motor had blown up. This was the vehicle for me as it suited my lifestyle at the time. Amongst surfers, Kombis were the ultimate status symbol back in the early '70s. After some haggling over the price the Kombi was mine for $500. The first thing I did was to install a dual carburetted 1600 cc motor to replace the worn out 1500cc motor. Next, a set of 6-inch chrome wide wheels and Kleber 195 x 15 radials, and I was ready to hit the highway. I did. First trip was down to Tumut for some white water canoeing, and then up to Mt. Kosciusko. The old Kombi went beautifully, especially up hills. The reduction gearing really helped out there but somewhat limited top speed on a flat stretch of highway. Numerous other trips followed. Surfing trips up north to Old Bar and Seal Rocks, down south to Ulladulla and Batemans Bay and Narooma.
Some of the other things I did to the Kombi (but now regret) was to install late model tailights and front blinkers; however this was the 'in' thing at the time. I also had windows installed along the side and panelled the insides with lacquered 3-ply timber. It certainly looked good at the time and was always popular with my friends. Every weekend it could be found in the Long Reef car park and at night outside the Pier Hotel. There was no shortage of people wanting a lift to the beach, or a camping trip up to the Barrington Tops in the Brown Bomber.
Then one day one of my mates bought one of those new 2-stroke Suzuki jeeps, and before I knew it everyone was buying 4WDs. Before long it was me who was getting lifts to those really inaccessible places that only a 4WD or Baja Bug can get to. By then too, the motor was getting pretty worn out and unreliable so I traded the Brown Bomber in on a Landcruiser.
As the years rolled by I often wondered what became of the old Kombi. People reported seeing it now and then 'til one day nothing. Anyway, late last year I saw an ad in Zeitschrift - Kombi double-door panel van for sale. I couldn't resist it so I bought it. I intend to fully restore it when I finish my oval beetle and I will keep it original, no modifications at all, not even a fuel gauge. At least for the moment I get to drive it in and out of our workshop everyday!
All About Kombis
By Simon Glen
February 1992
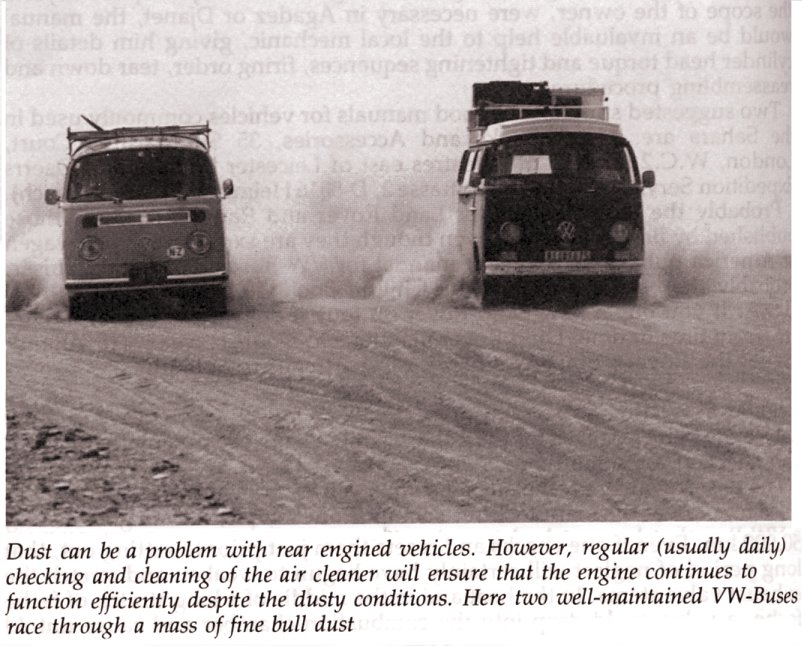
Volkswagen Kombis are seen almost everywhere, in places as disparate as Sweden, Indonesia, Brazil, Nigeria, Canada, Lebanon and Kenya. They cross the Sahara in temperatures over 50°C and equally happily inhabit the sub-zero lands inside the Arctic Circle. They operate without complaint below sea level and in mountain passes over 3000 m. They are nimble in traffic, exciting in twisting mountain roads, able to cruise relatively fast on expressways, and can still take a punishing in rough conditions.
Moreover, the Kombi is probably the only forward control van in the world in which the driver and front seat passenger can expect to live in an 80 km/h collision if seat-belted.
Like all cars, Kombis do have their faults. Probably their biggest asset is their strength and durability, but unlike the average Jap commercial they boast a sophisticated suspension system that enables them to out-roadhold many average saloons. This will often bring out the ‘driver’ in an otherwise staid owner.
The new Kombi owner quickly discovers that he doesn’t get a V8 response from the engine. He must be very circumspect about overtaking, and learn to hold back, wind up the engine, and overtake in a carefully timed manoeuvre.
Similarly, the owner finds out that full throttle in sand or mud does not pay off, and that his Kombi delivers tremendous traction in low gear at low revs.
It's possible for the new owner to make a lot of vital and expensive errors in terms of money, time, sweat, tears, swear words and knuckle skin. Much of this can be avoided by a critical examination of the experience and methods adopted by other owners.
Almost a prerequisite to understanding a Kombi is a decent workshop manual. One of the best available is published by Robert Bentley for Volkswagen of America, and is available at good motoring bookshops. It does refer to US-spec models, so the numerous differences from Aussie models must be borne in mind.

If you are interested in buying a used Kombi, the following pointers should help make your task easier:
1. Compression test; all four cylinders should be over 750 kPa, and no one cylinder should be markedly lower than the others.
2. Rust may occur in the battery compartment next to the engine, and in the bodywork immediately behind the gutter rails. This can be prevented by regular washing and waxing.
3. Front suspension should not sit too low. The distance between the front wheels and the top of the wheel arches is a good indicator.
4. Oil cooler: if this leaks, it will probably lead to overheating as well as to a loss of oil. This requires engine removal and partial dismantling to rectify.
5. Other oil leaks: such as main bearing seals, around studs and pushrod tubes. This may indicate a hard-worked engine that is likely to give you trouble in future.
6. Front disc brakes: bad scoring may indicate extensive off-bitumen use.
7. Chassis number: don't be taken for a ride by sellers. The chassis number always indicates the model year, no matter where the vehicle was built. The third digit is the important one: eg., 2332181742 is a 1973 model. 2372089341 is a 1977 model, and 266052289 is a 1966 model. The last-mentioned could be a 1976, but the visual differences between the models will be obvious.
From 1970 on all Australian-assembled vehicles have carried a compliance plate behind the driver’s seat, detailing among other things, the chassis number and the month of the year in which it left the factory in Melbourne (eg, 11/74). The model year in Germany is from September to August. Therefore, it is perfectly possible to have a 1972 model with an Australian assembly date of November 1971.
8. Overseas: If you buy a Kombi in Europe and wish to bring it back to Australia it must comply with all the Australian Design Rules at the date of its manufacture. The RTA and the NRMA both publish material on importing cars and ADRs. For example, it would not be wise to buy a British-spec Kombi made in October 1976, because it would not comply with a whole range of ADRs, especially ADR27a (exhaust emissions), which came into effect in July 1976. It would not comply in many other ways; ie. no reversing lights, no head restraints, speedo not metric, etc.
If you order a new vehicle for delivery in Europe and built to ADR specs, make sure you get any extras not normally available in Australia. Don't accept the salesman’s word that they cannot be supplied. Get him to look up the part number on the fiche.
9. Gearbox: make sure the transmission does not whine excessively, especially in top gear. This often indicates a worn crown wheel and pinion or pinion bearings. This is an expensive repair job and often unsatisfactory in the long term.
10. Sopru Campers made before 1975 had to be recalled to have screws inside the headlining above the driver’s head removed. A bad bounce could push an 18 mm screw into a driver's skull. Press up the headlining to check whether this recall repair was carried out.
11. Front end damage: examine the pillars between the front door and windscreen for signs of welding or respraying. This is a giveaway for a Kombi that has had a new front end installed following a bad accident. The repair job is never as good as the original, and windscreen rubbers will often leak. Another indicator: 1968-72 models with high front blinkers have had a new front welded on.
12. Ball joints: rubber boots protects the front suspension ball joints. If these are broken, have the ball joint wear checked by a VW dealer and fit new boots. Replacing ball joints is expensive, as it requires a special hydraulic press and much labour in dismantling the front axle.
13. Excessive wear on the inside of a rear tyre can indicate a bent rear control arm. This is an expensive repair job.
14. Engine sealing should be in good condition, not corroded by battery acid, and should not allow dust into the engine compartment.
15. Service: regular servicing by a VW specialist should mean a sound engine, but often local service stations do not have the special expertise to handle VWs.
Kombi Models
By Simon Glen
February 1992
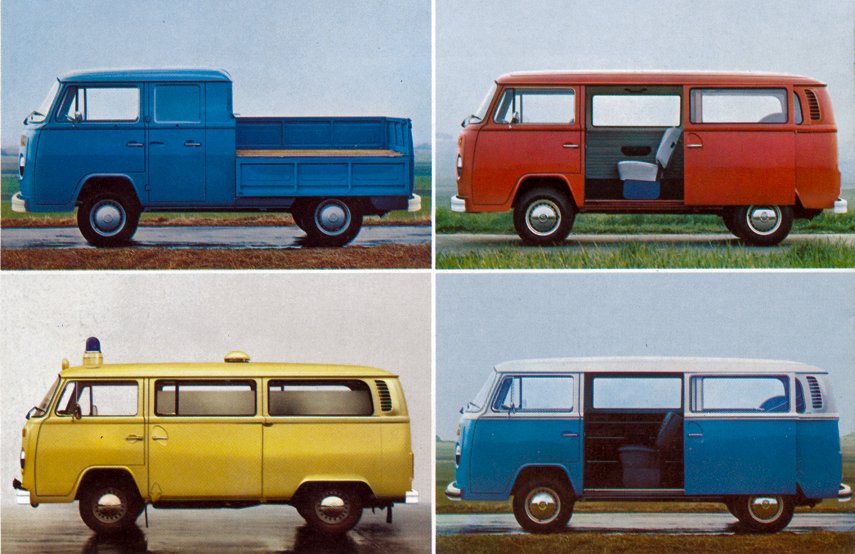
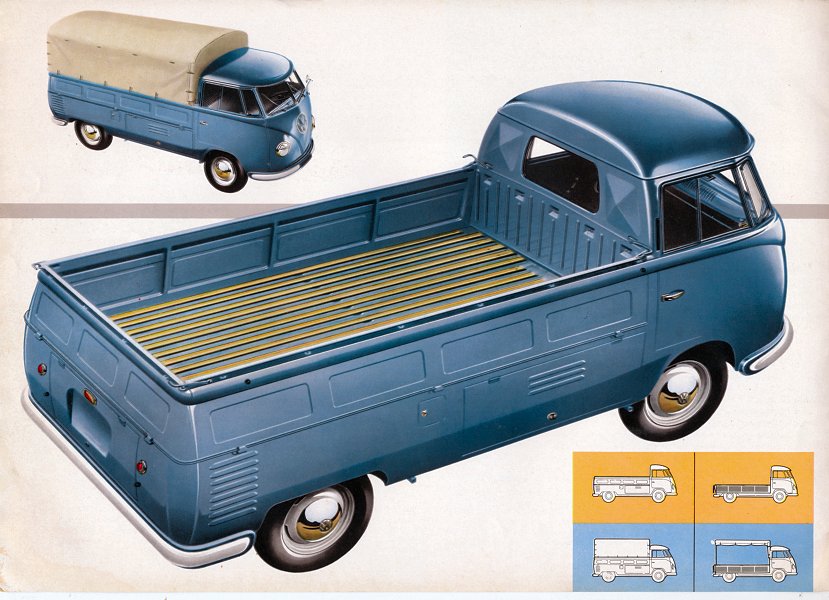
There are basically five types of Volkswagen Type 2 vehicles: the single and double cab pickups, the panel van, the Kombi (with factory windows and removable seats), and the Microbus (proper seats and full upholstery, etc). There are also high-roof, double sliding door, and steel sunroof versions of the panel van, Kombi and Microbus.
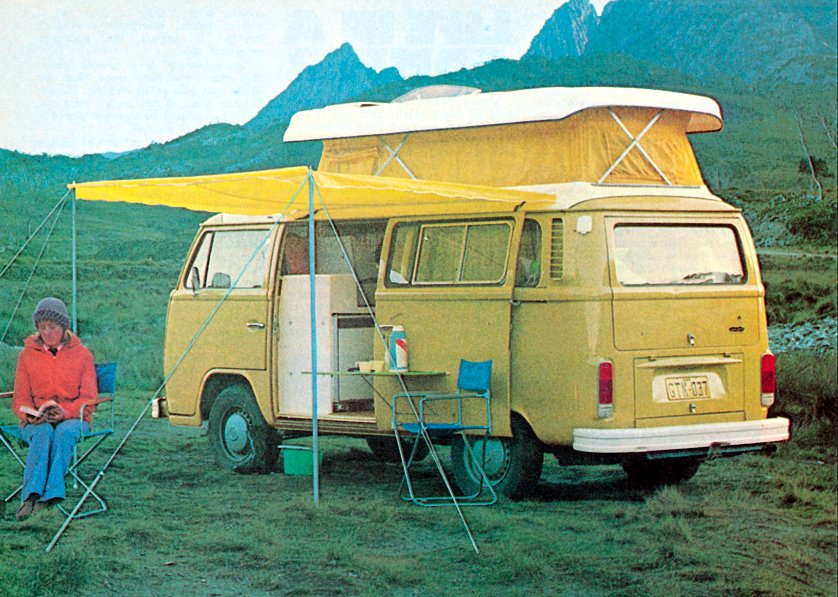
Campervans, or Campmobiles, are usually based on the Kombi. In Australia, most campers are made by the Sopru company in Adelaide and Sydney, but others are Swagman, Land-Cruiser and Trakka of Sydney, Dormobile in Canberra and Sunliner in Melbourne. The beautifully designed and made European factory model is the Westfalia, made in Wiedenbruck in Germany, but this wasn’t sold in Australia. Most US, Canadian and South African Campmobiles are Westfalias. The Westfalia’s greatest asset is that no hole is cut into the roof; rather, a special steel roof was installed at the VW Kombi factory in Hanover.
Some Kombi model characteristics are:
1965-66: ‘V’ front, 1500cc, single carb motor, six volt electrics, rear swing axles and reduction gears, king pin front suspension, 14-inch wheels on Euro models but 15-inch in Australia. Euro models have an optional steering lock.
1968: Full width curved windscreen, longer front section. Wind up front door windows. Walk-through standard in front, while three-seater partition is optional. 1600cc engine. Ball joint front suspension. Four CV-joint rear suspension, 14-inch wheels all around. Two brake circuits. Rear air intakes high and out of range of dust.
1969: Small changes only - bigger front axle mounting flange, front door locks modified.
1970: More small changes - front dash painted matt black.
1971: Some important changes, including front disc brakes, wider rear track, new perforated 4Jx15 wheels, optional brake circuit warning light, twin-port cylinder heads and relocated oil cooler. Rear brake pressure regulator. Some engines ran hot because carb was set lean and timing on number three cylinder was retarded. Later 1971 models were recalled and modified.
1972: Rear engine carrier modified, gearbox properly mounted on chassis. 1700cc twin-carb engine standard for USA and optional for Europe, and it runs much cooler than the older upright engine. Tail lights bigger, and rear air intakes restyled. Servo brakes standard on 1700 model.
1973: Front strengthened to withstand 80 km/h head-on collision. Bigger front disc brakes. Front indicators moved higher. New square bumper shape, with optional full- length rubber strip. Hatch at the rear for 1700cc engine, which is now optional for Australia. Improved accelerator linkages and non-greasable front ball joints.
1974: Some major changes this year. Type 4-based engine upped to 1800cc with better torque characteristics and improved valve guides. Paper air cleaner for 1600 engines. Petrol filler flap deleted. All door locks changed. Headlight washer system available in Europe. California models have fuel injection. Headlight reflector and lens glass no longer separate.
1975: Minor changes only: Indicator and wiper stalks changed, different steering column mounting. Bosch K-Jetronic fuel injection standard for USA and Canada. US vehicles have an afterburner pump plumbed into the exhaust. Front seats much improved. Head restraints also a different shape.
1976: Engine bored and stroked to 2000cc. Australian models from July to October ‘76 feature fuel injection, while the old upright 1600cc engine was discontinued.
1977-79: All VWs, Kombis as well as passenger cars, are now fully imported from Germany rather than assembled in Melbourne. Twin carburettors again fitted, together with EGR and fuel evaporative emission controls. Front door quarter-vents and chrome bumpers now fitted to Aussie Microbuses. Still many Euro options not readily available in Australia. Sales of this model end in 1980-81 as stock runs out.
1982: Series 3 VW Transporters arrive in Australia, fitted with fuel injected, air-cooled 2000cc engines.
1985-present: The watercooled 1915cc Wasserboxer engine replaces the trusty air-cooled unit. These Kombis can be spotted by the second, lower grille at the front. The engine is later boosted to 2109cc, together with the appearance of the optional Syncro 4WD system in 1987.
Kombi Dos and Don’ts
By Simon Glen
February 1992
Windscreen Protector: This leads to increased wind resistance, is noisy, and encourages rust and damage to the front gutter rails. A laminated windscreen is the only answer to stone damage, and should be standard for Australian conditions.
Hard driving and sudden engine kill: The already high engine temperature will actually increase briefly. Before switching off, allow the engine to idle for 10 minutes or so to allow the temperature to drop. VW engines run coolest when idling.
Best of all, fit a VDO oil temperature gauge. The sensor replaces the normal dipstick, but can only be easily adapted to the 1600cc engine. If you own a 1600 Kombi, slow down if the oil temperature reaches 125°C and don't switch off until it has fallen below 105°C. This will minimise the risk of cracked cylinder heads. In ambient shade temperatures over 40°C it will be difficult to cruise at more than 85 km/h without the oil exceeding 125°C. So slow down in very hot conditions.
Overloading the front: Load the centre/rear of your Kombi in preference to the front. Front loading makes the steering heavy and inhibits front suspension travel. It can be very damaging. If you want to use a roof rack, load it over the centre/rear. If your Campmobile has a front roof rack, don't load it with heavy items like gas bottles, spare wheels and full jerry cans, or large wind-resisting objects. Remember, even a Kombi has limitations. If you have to carry a lot of gear, stash it inside on the floor. The greater your payload, the harder your engine has to work, and you reduce your chances of getting through heavy sand.
Wide wheels: Kombis have excellent roadholding and do not need fancy wheels. Cast magnesium and other alloy wheels break in rough conditions. Also, their extra width strains wheel bearings and places unnecessary stress on the suspension, drive shafts and CV joints.
Engine bay storage: Do not stow spare tools, gas bottles or other equipment in the space to the left of the engine. This limits the flow of cooling air to the fan.
Open lid: Never drive with the engine lid open. Far from cooling the engine, this practice has the opposite effect. Hot air from the engine air outlets and exhaust is sucked in, as well as dust.
Air cleaner: On 1600cc engines, make sure you have an oil bath air cleaner if you intend driving on dirt roads. If necessary, convert to a Donaldson air cleaner, especially for big 1700, 1800 and 2000cc engines. VW dealers and off-road specialists can supply the correct kit for this conversion. Check your air cleaner every day in bad conditions. In the Sahara, for example, a daily clean can reveal five to seven cm of mud in the bottom of the air cleaner.
Franz oil filter: This is a bypass system using a 1000-sheet toilet roll, which is changed every 2000 km in addition to the normal 5000 km oil changes. The filter requires over a litre of extra oil, which gives the engine an extra safety margin.
Regular servicing: VWs look after you if you look after them. Increase the service frequency for some components, especially tappets, which should be checked at least once every 5000 km.
Gearbox protector: Fit a heavy steel guard to the front of the gearbox. This prevents the gear carrier part of the gearbox from getting smashed or bent, eliminates damage to the clutch cable conduit, and on ‘68 to ‘71 models stops the engine and gearbox from being pushed back (this would strain and fracture the engine carrier and almost allow the engine to drag on the ground).
Q-H lights: Fit quartz-halogen headlight bulbs. They produce nearly double the normal candlepower and, although they can cost more than $55 each, are really worth it. Also, wire headlight stone guards are a good idea for off-road travel.
Tyres: Make sure your Kombi is shod with a good set of radial tyres. Kombis become very lively handlers with these, and good radials should last at least 70,000 km. Fabric radials and retreads, on the other hand, last only 30,000 km and don't hold the road nearly as well. Retreads can also shed the tread at highway speeds, causing a vibration and shake and an unsafe driving situation, as well as possible damage to your bodywork.
Fire extinguishers: Carry one in the front and one in the rear. Never drive with the engine lid locked. Your maintenance program should have eliminated the possibility, but should your 1600 Kombi engine catch fire it can flare spectacularly if the magnesium alloy crankcase catches. Speed is essential before this desperate stage, as they are then very difficult to put out.
Tappet covers: Put a smear of grease on both sides of the tappet cover gaskets. This holds them in place as you install the cover and prevents oil leaks and the entry of dust.
Shock absorbers: Make sure your Kombi has the big, fat heavy-duty VW Boge shock absorbers. The skinny ones die quickly. Koni and Bilstein shock absorbers are good alternatives to the fat Boges.
Spares: There is really no limit to the spares one can carry. The parts you take will depend on the type of terrain, climate and the remoteness of your journey. The suggested parts list below is for the person who feels capable of doing only rudimentary service and repair operations - oil changes, timing, tappets, etc. But such a person should also carry spares that Fred Bloggs at Thargomindah garage would need to carry out major work on a Kombi, thus avoiding the long wait for parts to arrive. Of course, you should lend Fred Bloggs your workshop manual so that, for example, he will know the correct torque settings and tightening sequence for your VW cylinder heads.
* Distributor cap, coil, condenser, points, rotor (need not have the governing cut-out)
* Spare battery. It is terrible being stuck out in remote country with a collapsed battery cell.
* Tappet cover and oil strainer gaskets.
* Oil filter (for big engines) and toilet roll filters. Fan belt.
* Emergency push rod tube (concertina type), and push rod.
* Spare exhaust valves.
* Complete gasket set.
* Clutch and accelerator cables. Get your parts man to double-check these against your chassis number and engine type.
* Brake fluid, and at least 5 litres of oil.
* For ‘68 to ‘71 models, a spare engine carrier.
Tools: One could take along a complete workshop, but the following should suffice for most people:
* Full set of metric crescent and ring spanners. 7-19 mm socket spanners. Some major jobs also require 27 mm, 32 mm, 36 mm, and 46 mm sockets.
* Vice-grips, multi-grips, screwdrivers, pliers, etc.
* Set of metric Allen keys, and torque wrench.
* Breaker bar for large sockets.
* Grease gun, metric feeler gauges.
* Long cranked funnel for petrol.
* Puncture repair kit - the German Rema-tip kits are excellent.
* Tyre levers, and bead breakers.
* Tyre pump and gauge.
* Steel jerrycan(s). The German Army style are best. Don't use wide mouth American cans. They will not seal properly and are difficult to pour from.
* Jumper leads for battery.
Living With A VW Camper
By Anthony Curtis
February 1992
Living in a campervan - cramped? Uncomfortable? Heavy on petrol? Cumbersome to drive?
Not on your life. The only genuine critics of camper living are those who’ve tried to cram too many bodies into them. The rest are straight-out ‘knockers’ who’ve either never driven - and lived in - one, or consider themselves purist enthusiasts, the kind of vehicle snobs too ignorant to realise that functional design can still be aesthetic. It's all a matter of purpose.
My camper is a true multi-purpose vehicle. I use it in day-to-day routine as a car, and at weekends and on holidays as a mobile home. It handles the rough as well as anything except (and sometimes including) a four-wheel-drive, but the smooth stuff as comfortably as the average saloon.
I chose a brand-new VW Kombi as the base vehicle because I considered it offered better value than its rivals - Ford Transit, Bedford, Toyota and Nissan E20, all of which I did have on the short list. The Veedub scored higher in all general criteria - initial price, rate of depreciation, reliability, running cost, handling. And I reasoned that its shorter wheelbase would make it handier to park around town. Time, of course, proved that the Kombi was immeasurably superior to these other vans.
Having selected a VW, I opted for the 1600cc engine because in a vehicle of this type I wanted economy before performance, and for the base van without windows. It worked out much cheaper this way. The delivery van is the same as the Kombi and Microbus in everything but dress, and was several hundred dollars cheaper. Windows could be installed for half the price of the special VW windows, which sometimes leaked anyway.
I didn’t buy a ready-rigged VW camper for the same reason I wouldn't buy a project house if I could get an architect-designed one at less cost. Research had also led me to believe that the pineboard carpentry in the off-the-shelf VW campers would loosen and rattle after a time. It was heavier, too, than the fibreglass conversion I had in mind.
The conversion, carried out by the Swagman company in Lidcombe, Sydney, cost me $2000 in 1975. For that price I got everything except the more exotic extras, such as air-conditioning (imagine the poor 1600 otherwise!), magnetically attachable flyscreens and an attachable tent. The price also didn’t include a roo bar, which I decided against on the grounds that the covered spare wheel, shifted from the interior to an outside front bracket, offered sufficient front-end protection.
Complete, the all-up cost of the camper, less insurance and rego, broke down to: Base vehicle $3813 (April ‘75), windows $100, conversion $2000, for a total of $5913. Expensive for a car, maybe, but not for a car and a mobile holiday home.
Over the years my wife, child and I have done a lot of living in that VW camper. It's been bush, interstate, trekked in Alps snow and Western Plains heat. My only real complaint? I wish I had two of them, so 1 could rent out the spare and make a fortune.
Living in a camper requires some planning. You soon learn that once you've organised your gear it's a whole lot easier to leave it there. You don't, for example, take plates, cutlery and condiments that you also need at home. Transferring them back and forth from camper to kitchen is too much of a drag. So you have a second set of kitchen utensils, probably the old chipped stuff, and that stays always in the camper.
You make great use of plastic boxes, the airtight ones that come in all shapes and sizes, and can be bought in any department store. They stack easily, particularly in the fridge, don’t rattle, are easy to get to in a confined space, and eliminate that nagging suspicion that you've left something behind at your last camping spot.
Unless you're heading off immediately to some totally arid area, refrain from filling the water tank at point of departure. Mine holds 45 litres, which is enough mass to boost the petrol bill noticeably on long trips. You'll get there faster and more economically if you fill up with water at the garage nearest your destination.
Some camper owners carry a second 12-volt battery, arguing that they need a backup for the power drain of the fridge, lights and, perhaps, electric frying pan. I don't find this necessary. In mine, as in most of today’s campers, the fridge works off any of three power sources - the 12-volt car battery, bottled gas, or 240 volts. I switch it to 12 volts when leaving and turn it over to gas, which also fuels the stove, when camping overnight. A covered outside plug at the rear of the Kombi means I can tap the 240-volt power sources at caravan parks, although in fact I've never had to do this. The 4.5 kg gas bottle, which I top up when I remember, provides enough LP for family feeding for about three weeks - longer than I've ever camped at one stretch! The interior lighting drain on the battery is negligible, thanks to the transistorised strip light in the pop-up roof.
In the interests of safety, I make it a rule to have the gas off when on the move. Battery power, constantly charged by the generator, is sufficient for all systems (car electrics and fridge) and the battery, in fact, won't begin to run down until some five to seven hours after the engine has been switched off. For this reason, I don't bother to turn on the gas during roadside stops unless I want to use the stove. As another safety measure, I carry a fire extinguisher - dry powder with a CO2 cartridge - on a bracket behind the front passenger’s seat. It lowers the insurance premiums, too.
Overcrowding in a Kombi camper begins only when you have more than two adults and two small children aboard. But the ideal, of course, is a twosome, which means both cosiness yet plenty of room to move around.
Most of the advantages of camper vans are fairly apparent; the cost-saving on motels and rented holiday houses, being able to pull up anchor and shift without hassle or fanfare, the duality of having at the same time an urban and suburban commuter vehicle, which you can park legally on loading zones. Others are less apparent. Did you realise that they add an extra room to your house? If you have a small flat and some people want to crash for the night, then you can put them up without cluttering the lounge room floor - in the Kombi camper.
Another use is load carrying. The Kombi has a one tonne payload and even an elaborately fitted out camper still has plenty of room for light trucking chores. I remember once moving four bulging tea chests and five bulging suitcases for a friend who'd just moved back from overseas. They all fitted just - but the mirror was still unobscured and there was still room for the passenger up front.
Doubters might still say - well, why not a car and a tent instead? Then you would have performance, plus a getting-away-from-it-all facility. Perhaps. But I remember once camping at Geehi, above Khancoban in the Snowy Mountains one cool autumn, playing cards in the Kombi dressed in board shorts, the warmth guaranteed by the insulation and the simmerer setting on the stove. We looked out sardonically at a wretched group huddled in a tent nearby, their fire spluttering in the rain and a whistling wind chilling their bones.
It took them an hour to pack up in the morning, shifting their gear to the back of their ute, taking down their sodden tent, rolling and packing it. All I had to do was roll up the awning at the side of the Kombi, drop the roof and turn off the gas. Five minutes easy work.
Despite all, however, there are disadvantages in campervans. On trips I get 22 mpg from mine, but it labours on steep hills and I've only got to 110 km/h downhill on expressways. I also have to wash and polish it myself - with a height of 2.0 metres it's too tall for the standard auto car wash.
Automatic transmissions are not recommended, at least for VW campers. Even an auto 1800 or 2 litre is difficult to put up over a kerb. Manuals on the other hand, present few traction problems and the engine weight over the rear wheels allows you to churn through swamps where many sedans would fear to tread.
For married men, campers pose special problems. When you come home late, it's no use arguing you've been a good and faithful lad when she knows what you both know - that you've been travelling in a mobile bedroom.
Travellers’ Troubles
By Lance Plahn
February 1992
There are probably a number of reasons, but more and more Americans, English and Europeans are engaging in a 3-6 month holiday tour of Australia. Arriving at one of our International Airports, one of their first priorities is to purchase a cheap vehicle for the purpose of seeing the sights of Australia. A popular choice is a VW Kombi Camper, which is then resold just prior to departure. Vehicles are often sold to another traveller, changing hands many times, sometimes not even transferring the registration.
The following story is a true account of a couple's last few weeks in Australia, doing the rounds of VW garages as opposed to sightseeing (not by their choice). Names and addresses have been excluded to protect all parties.
I run a VW workshop. Just on opening time, I received a phone call from another VW repairer located a few hours drive away, advising us he recently did some work on a Kombi travelling in our direction. Their apprentice, who later took the day off to remove an imprint from his tail, had left the air cleaner off the said Kombi. He requested we fit an air cleaner and send him the bill.
Later that morning the Kombi concerned arrived. On fitting the air cleaner, we advised the owners we didn't have the filter section which sits in the oil bowl, so we would convert the air cleaner to dry element type. The owners were unsure of this modification, telling us they had spent four weeks and $3000 in numerous garages already, only to break down a few hours after leaving each time. We assured them it was a modification approved by VW and that it would be all right.
Two hours after the travellers departed, we received a phone call from one of our VW parts suppliers, telling us they had been contacted by the Kombi owners, who had just put a conrod through the crankcase. It was one of their exchange motors still under warranty, and arrangements were being made to have the poor Kombi towed back to our workshop. They requested we fit an exchange motor (which they would dispatch that day), and of course to send them the bill.
Later that day the Kombi arrived and yes, a conrod was emerging from the crankcase, and there was still plenty of oil left in the motor. For the record this Kombi was a ‘72 Camper fitted with a 1600cc twin port motor. The engine was soon dropped out and the tinware removed. During this procedure we began to notice a few improprieties.
One - the foam engine bay seal had not been fitted correctly behind the fan housing, and in fact had been sucked into the cooling fan. Two - the cooling fan in place was the narrower unit fitted to single port motors, not the wider unit specified for twin port engines. Three - with the aid of an adaptor plate a 30 PICT carburettor was fitted, as opposed to the correct 34 PICT4 carburettor. We also noted the melted spark plug rubbers, seeming otherwise to be quite new, which had adhered to the tinware. The owners told us they were cruising at 100 km/h when the engine failed. The Bureau of Meteorology recorded a district maximum of 39.6°C on that fateful day.
A shop discussion was held to discuss the findings, with the decision being made to inform the engine supplier of the above factors. After all, they were the ones honouring the warranty, and we were their source of information.
Next day the Kombi owners returned to get the latest update on the situation. The replacement exchange engine had arrived, being a 1600cc twin port with a 6-volt flywheel, built on an early 1300 Beetle crankcase. Apparently the VW parts supplier was phasing out exchange engines, and this one and the failed motor were at the end of their supply. We showed the Kombi owners what we had found and explained what effects it would have on their motor.

The owners then told us their story. They had been experiencing trouble with their motor, taking it to many garages to have the problems rectified but only to have it then expire. A garage then fitted this motor, after sourcing it through one VW suppler from the VW parts supplier now honouring the warranty. It took three days after installation to get the motor running. Upon resuming their journey the owners soon experienced trouble. They sought out another garage down the road, who found the timing was a long way out. Continuing on their journey, trouble again reared its ugly head, this time in the form of leaking cylinder heads. The heads were repaired under warranty by yet another garage and they were sent on their way, minus the air cleaner. We fitted an air cleaner as requested, only to have the motor fail a short time later. They were now in a situation where they no longer knew who or what to believe or trust, but they knew the trouble was brought on due to fitting the incorrect motor (the engine was built on a Beetle crankcase and used an adaptor plate to fit, rather than using a Kombi crankcase with three point mounting). They rightly insisted the technically correct motor be fitted, and not the replacement one sent.
We advised they would have to take the matter up with the VW Parts engine supplier, and they did so. Details of that discussion are very hazy, but the offer of warranty was then withdrawn. Loss of warranty was then accredited to us over our findings, and the informing of the parts supplier thereof. Things did not look at all good for the Kombi owners then; no warranty, not enough money to cover repairs to the vehicle, and only three weeks to their Australian visa expiring.
Outside help was then sought by a Consumer Agency and an Auto Club of which they were members - after all, they did go to garages recommended by the Auto Club. Both of these organisations soon arrived at our garage to investigate the situation, believing they should receive warranty and that our findings on dismantling had no relevance to the failure. Nevertheless the engine was taken by the Auto Club to be dismantled and inspected, and fortunately we had kept a sample of oil, which we gave with the motor.
The Auto Club later rang to say the heads, pistons and cylinders had been examined and they could find no sign of cylinder damage due to running with no air cleaner or signs of overheating. Heads, pistons, cylinders and push rods were not discoloured and there was plenty of oil around the piston rings. The oil sample was not tested. They therefore believed the owner should receive warranty. All we could suggest was to take the matter up with the engine supplier, and they did so.
This story unfolded over a period of ten days, with a lot of blame and insults being handed out in the process. The garage who left the air cleaner off ended up supplying a reconditioned motor and the owners had it fitted by another garage. I believe there are a lot of lessons and morals to be derived from this incident. It's up to you to make your own assessment of this event.
Confusion
By Lance Plahn
December 1995
I would like to share with you a true story, which happened last month. For those who don't know me or remember me, I work as a mechanic at a Shell Auto Care garage in Rockhampton, central Queensland.
On arriving at work early one Monday morning, I was greeted by an awaiting 1971 1600cc VW Kombi that had several oil leaks. After checking and giving an estimate, I was given the go ahead to carry out repairs. It should be pointed out that the owners, a couple in their twenties, had just arrived in Australia from their home land Switzerland and purchased the van for $2400 to travel around OZ on their three month visit. They had only a limited English vocabulary, which was better than my Swiss.
The motor was missing the left and right under barrel deflector plates, left and right lower cylinder covers, and both rear deflector plates. It had the usual oil leaks - crank seal, oil cooler and pushrod tubes. On removal of the engine I soon discovered some cracks in the crankcase - one in the oil gallery to the cooler, one behind the flywheel on the No.3 side, and another coming from the top centre case nut, all of which were loose.
Well it was obvious that a few seals were not going to plug this leaker, so a new estimate on an exchange motor was given, for which their poor understanding of the Aussie language took a nosedive. After some negotiating the go ahead was given for an exchange motor. A motor was ordered and fitted with all the tinware.
The owners dropped in just as I was finishing the job, and I explained I was going to take the van for a test drive, so the husband decided to tag along. As we were driving along we talked about many things, then the subject of the van popped up with the owner saying, "I have been taking it easy, 80 km/h. Will it be OK to sit on 80 km/h while running it in?” he asked. “Yeah, that would be OK, I replied. I pointed to the 50 mph mark on the speedo, but he pointed to the 80 mph mark. Well, you can imagine his surprise when I explained the Australian imperial speedo in this Kombi versus the metric system he knew.
On arrival back at the shop, he explained the lesson in Swiss to his wife who rushed over seeking confirmation to their illegal driving habit. My next task was to place masking tap on the necessary speedo places - 60, 80 and 100 km /h to help improve engine life and lower the risk of speeding tickets.
It makes you think and wonder.
Tuning Tips for Twin-Carb Kombis
By Steve Carter
October 1996
The twin carburettors on Kombis can cause no end of problems unless they are set up correctly. I will try to explain how to set them up in plain English. Of course, before you start playing with the carb adjustments, you should make sure that the rest of the engine is correct first. Correctly adjust the valves, the points gap and ignition timing, following the instructions in your VW workshop manual.
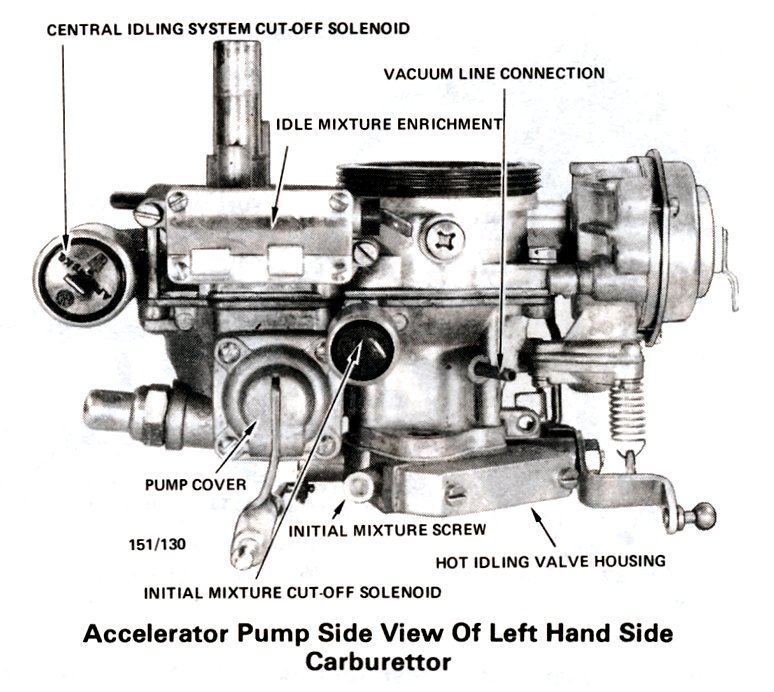
First, you must understand that there are actually three separate idle systems on these carburettors, and they must equally contribute to the idle speed and mixture for smooth idling and acceleration. I will first explain the 3 idle systems. The right hand carburettor has a sunken mixture screw that was originally covered by a protective plastic cap. VW did not want you to touch these settings but if the plastic caps are missing, every man and his dog probably have had a twiddle with them. Idle speed or throttle opening at idle is controlled by a small screw on the linkage lever. The left hand carburettor contains the same system with the addition of the third idle circuit. This idle circuit has two adjustment screws on top, the large one for idle and the smaller one for mixture adjustment. That funny little black steel pipe on the left hand side air cleaner supplies air to the third idle circuit, and fuel is supplied from the left hand side carburettor float bowl.
To get all systems contributing equally (idle speed and mixture), you must first disable the third idle circuit. You can do this by removing the wire from the large solenoid screwed into the left carburettor top. The revs should drop to about 500 rpm if the system is working correctly, which it probably isn't. The large solenoid in the left carburettor often comes loose and enlarges the hole it screws into. If this is the case, it can be heli-coiled. You will usually need a new solenoid, as the cotton reel shaped plunger on the end will often be worn and will not seal, and the mating surface the for cotton reel to is often damaged. If this is the case you can usually do away with the solenoid altogether by just plugging up the hole with a bolt or something, and a little bit of araldite to seal it.
The third idle circuit can also be disabled with help of an assistant. Remove the black steel pipe from the top of the left hand carby, together with rubber elbow and ask your assistant to put a finger over the brass tube that pokes out of the left hand carby top.
The solenoid is supposed to stop run on, but if the other two idle jet solenoids on the left and right carbs are working, and the compression is not too high to cause run on or the idle speed too high, it should not cause any problems.
After having disabled the third idling system (also called the central idle circuit) you can start synchronising the left and right carbs. It's important to have idle set low on this conventional type idle system (about 500-600 rpm) otherwise when the central idle is brought back in the idle will be too high and the large idle screw will have no effect. Disconnect the linkage from carby levers, give each carb a blip and check idle synchronisation. You can do this three ways.
You could use a synchronisation tool, such as a pea in a tube. Or you could remove the small idle solenoid wire, one at a time, and note the difference in idle speed on a dwell tach, or by ear. Or you could remove 2 and no.4 spark plug wires one at a time, and noting the difference in idle speed side to side. The first two methods are the least exciting. After any adjustment on the small idle screw on the linkage lever, blip the throttle and re-check your idle speed difference.
Now comes the mixture adjustment. You either need an exhaust gas analyser or a pretty good ear to pick up where the car idles the best with the individual mixture screws wound in as far as possible and still having a smooth idle. It's best to alternate between the mixture adjustment and the idle speed differences a few times, as they both have bearing on one another, and still keeping the idle speed about 500-600 rpm. Also remember to give your assistant a chance to change fingers occasionally, or you could plug one of the rubber elbows to do the same job.
After you have this system running sweetly, you can get back to control idle circuit. Re-engage it by reconnecting the wire to the large solenoid on left hand carby, and blipping the throttle or by extracting the assistant’s digit. Then just set the mixture and idle speed back to around 900 rpm.
VW Type 2 Station Wagon
By Ron Hickman
October 1998 (originally published 1971)
One of the latest automobile fads, particularly in trend-setting Southern California, is the use of a delivery van for personal transportation. You see all manners and types of vans, with curtained windows, rear shackles lengthened to hoist the rear end, fat rear tyres, surfboards mounted on top or protruding from the rear door, and eight-track stereo blaring away. It makes a lot of sense. You can carry a staggering volume of people and/or sports equipment in a van. People have been known to live in them, and by adding a few seats the utility of a station wagon is obtained at a lot less cost.
There is undoubtedly a substantial market for box-like vehicles seating seven or more in comfort in a large space, which can be readily filled by a standard, commercial van. Since Volkswagenwerk AG has been highly successful in sensing new market trends, one might wonder what new offering could be expected in 1971 from Wolfsburg to capitalise on this one. The answer is none. Their entry in the van-wagon-campmobile market was introduced to the U.S. in 1955. It is called the Type 2, differentiating it from the Beetle (Type 1), or the 1600 Fastback (Type 3). Instead of Volkswagen having to come up with a new vehicle for this sector of the automotive market, their Type 2 has probably helped more than any other to create it.
There are five two-tone colour combinations available in the single body style, each sharing the pastel white top. Most customers will no doubt favour Chianti Red. In addition, there is a soft blue, green, beige, and finally the colour of our test car, Sierra Yellow, which is an exact duplicate of the colour scheme recently adopted by General Telephone Company for its fleet of thousands of service vehicles. We were repeatedly asked when we had gone to work for the telephone company, so unless you are a career professional in the telephone communication field, pick another colour.
Consistent with Volkswagen policy on model changes, the 1971 Type 2 is the result of evolutionary rather than revolutionary changes. The opposed four-cylinder engine now has 50 percent more displacement and twice as much horsepower than when it started life in 1950. The rounded edges found on the early wagons have been squared off so that no space is wasted. It appears Volkswagen has adopted the philosophy that if the blessed thing is going to be called a box, it might as well look like one.
There are comparatively few departures from conventional Volkswagen design in the 1971 station wagon. One of them is an increase from 57 to 60 SAE horsepower, brought about by a change to a dual-port intake manifold and improved carburettor. Longer engine life will result from the use of a new magnesium alloy in the crankcase and also from improved cooling contributed by a new aluminium oil cooler and a larger fan. Among the changes needed to maintain engine emissions within 1971's more stringent levels are additional engine modifications, a new carburettor, and the evaporative control fuel system. We also noticed that the ignition timing has been retarded another five degrees, and is now at 5 degrees after top-dead centre.
The four-speed all-synchromesh manual transmission connected to the engine with a single plate dry clutch is the only one available on the Type 2. Gear ratios are quite low, with a 5.375 final drive ratio. Although this allows the wagon to climb a 27 percent grade or pull stumps up to 45 cm in diameter, it means that the car runs abruptly out of revs at 25 km/h in first gear, at 40 km/h in second, 80 km/h in third, and in fourth gear horsepower matches drag at a true 110 and an indicated 116 km/h. It also means that it can and usually must be driven flat-out on the freeways.
Torsion bar suspension is used all round. Spring rates have been softened from the rock-hard setting used on earlier VW wagons. The dreaded rear swing axle is a thing of the past, having been superseded by double-jointed half-shafts located by trailing arms and diagonal links. A front stabiliser bar is standard equipment.
One of the major 1971 changes, and a most welcome one, is the switch to power-assisted front disc brakes, augmented by a 20 percent increase in rear lining thickness and by a brake-force regulator in the rear brake circuit which functions as an anti-skid device by helping to prevent premature rear wheel lock. Brake cooling is aided by the use of perforated wheels, and handling has also been improved by increasing the wheel width half an inch to 5-1/2 inches.
When comparisons are made between station wagons, though, it's what's inside that counts. And what's inside the VW Type 2 is room ... lots of it. We regard the interior room and accommodation as its most outstanding feature. The model we used for our test was the three-door, seven-seat version with a pair of bucket seats in front; a rear bench seat which accommodates three and a bench seat for two between them. Even with this much seating, there's enough room left over to virtually walk around. Other interior options include a nine-seat wagon (the ‘bus’ of VW advertising) and a camper arrangement. The seats can be removed by loosening a few wing nuts to make a rapid conversion to a delivery van configuration. When this is done there is a total of five cubic metres to fill with furniture, gardening tools, camping gear or basketball teams. If the assigned task includes transporting totem poles or grandfather clocks, an optional sliding sunroof is available.
In addition to this space, there is also a one cubic metre luggage compartment reached through an upward swinging rear door. This space can hold a substantial number of suitcases (provided that some provision has been made to restrain them from flying forward in the event of a sudden stop) at the price of completely blocking the view through the rear window.
Unfortunately, access via the front doors to a commodious interior leaves something to be desired. The front seats, which are positioned directly over the front wheels, are 99 cm above the road, and the front floor is 56 cm above it. To climb into the front, it is necessary to step forward of the seat, not an easy task unless the door is at its maximum opening, grab something convenient like the steering wheel or top of the door and haul away until elevated sufficiently to assume a seated position. It's about as easy as it sounds. Dismounting is done in the reverse manner, though possibly a little more gracefully. Although this is a rather harsh condemnation, we can't honestly suggest how the situation could be improved; the seats are really in the right place.
Once seated, comfort is top level. With all the interior height available, the seating position is fully upright, and the front bucket seats are curved enough to provide a good degree of lateral support. The driver's seat is provided with a back-rake adjustment in addition to the forward and back adjustment.
Access to the rear seats is a different story. The sliding side door exposes a 110 x 122 cm opening through which either rear seat may be reached conveniently. Actually the front seats can be reached by this means also, since there is a 35 cm-wide opening between them, which also allows easy transfers within while on the road.
With the massive array of side windows and the large windscreen located close to the driver, visibility is great in all directions save directly to the rear through the rear window. Here the placement of the inside mirror is such that the driver is unable to see the horizon behind him, and in fact a car immediately following is cut off at about the belt line. No amount of squirming or adjustment could correct this situation, which could be potentially dangerous. It does appear that the inside mirror could be mounted lower; this, coupled with a change to a larger mirror, should solve the problem.
The driver is provided with the traditional VW instrumentation and control package, consisting of speedometer with fuel gauge and warning light cluster and an array of push-pull switches for headlights, wipers, inside light and electric rear window defroster. The Type 2 shares with the balance of the '71 VW line a ‘memory’ switch that turns the headlights off while leaving the parking lights on when the ignition switch is turned off without turning off the headlights. After years of production, all operational problems have been solved save for the distance between the gearshift and transmission, which introduces some uncertainty into the linkage.
There is a very effective ventilating and heating system. Fresh air is supplied through six outlets controllable from the dash with two supplying the windscreen, two outlets in the dashboard, and two supplying the rear compartment through ducts located on the inside of the front doors where they also double as arm rests. Flow-through design allows exhaust and a comfortable airflow through the car while cruising without the need to lower any windows. Heat is supplied from an exhaust manifold heat exchanger in the traditional manner. There are five heated air outlets beside the two defroster outlets at the windshield. Each heater outlet can be separately controlled.
Thanks to the revised spring settings the VW Station Wagon delivers an acceptably comfortable ride over any paved road surface that we could find, and holds its own on the dirt stretches we encountered. However, any attempt at brisk cornering will probably strike terror into the heart of a driver inexperienced in the operation of van type vehicles. A seating position above the front wheels and less than two feet behind the front bumper permits an unusual degree of awareness of what the front end of the vehicle is doing. Once armed with this realisation, the VW wagon's cornering performance is revealed to be on a par with its class.
Straight-line performance is either suitable or unsuitable, depending on driving habits. Sixty horsepower will only accelerate 1,350 kg so fast. In this case, we departed from our normal practice and took the acceleration times with four people on board. Thus, although, they don't represent the car's absolute performance potential, they do give a very honest picture of what the average owner can expect to achieve when he has the whole family with him. Top speed, 116 km/h indicated, is reached after a genteel wait, and getting up to this velocity in less than a minute is accomplished only by taking the engine to or past the maximum recommended speed in each gear. Freeway cruising at 100 km/h or better requires nearly constant use of full throttle on anything but a dead level surface. Although the owner's manual assures you that the normal cruising speed is the same as top speed, we can't help but wonder what a steady diet of this would do to engine life. Incidentally, any acceleration through the gears is accompanied by noticeable drive train noise in the three lower gears.
The owner's manual suggests a limit of 450 kg on the weight of any trailer, and we question the use of any trailer at all, although we've seen many of them over the years.
If the acceleration is not impressive, the braking performance certainly is. On both a qualitative and a quantitative basis, the operation of the power-assisted disc brakes is nothing short of overwhelming. The favourable impression starts with the feel of a swift sure stop with no directional instability or lock-up as soon as the brakes are applied. It's almost as though the proverbial great hand is reaching out to take hold of the car. The numbers bear out the feeling, with the stopping distance of 51 metres from 100 km/h, being equivalent to a deceleration rate of about 0.72 g. While reducing our field test data to the proper format for the data sheet, we became intrigued with comparative acceleration and deceleration rates, and came up with the interesting fact that the average deceleration rate from 100 km/h to stop was exactly twice the average acceleration rate to 100 km/h from a standing start. It is comforting to know that you can stop in half the distance that it took you to reach a given speed.
After the fact that the engine is accessible from the rear rather than the top has been accepted, one realises that all components are indeed readily serviceable, although it's a longish reach into the battery, which nestles just to the right of the engine. The service of this without spillage requires a special pitcher, which normally is found only at a station specialising in Volkswagens.
Gas mileage claimed by VW is 10 L/100 km, this being achieved at 75 percent of maximum speed, or 85 km/h. Since we can't imagine anyone driving on any state or interstate highway at less than 100 km/h when weather and traffic conditions permit, we took our fuel economy data at that speed and recorded a figure of just over 12 L/100 km. This is very comparable to the city fuel economy, which averaged out at just over 12.8 L/100 km, and the country mileage is only marginally better than the city mileage because it was nearly all recorded at full throttle.
On a price per unit of weight or length, the VW wagon costs about the same as a domestic station wagon or van. This is to the great advantage of the VW, which can be bought for under $3,000 if you supply your own music, or for $3,095 POE Los Angeles (plus the usual destination, dealer prep, tax and license) with the optional side vent windows and an AM radio as installed on our test car.
The VW station wagon will not appeal to boat owners, drag racers or arthritics. It can be an outstanding conveyance for commuters in large ride pools, den mothers, Scoutmasters and camping families. Its principal drawbacks are power-to-weight ratio, front seat entry and exit, and unacceptable visibility through the rear window.
These are countered with truly outstanding comfort for seven passengers complemented by a capability for movement inside the vehicle while on the road (Don't knock this feature if you've never taken a long trip with small children.) It has great visibility to all points of the compass except the rear, an effective ventilation and heating system which distributes heat to all parts of the interior, and a favourable purchase cost followed by reasonable operating costs and unusually low depreciation. And, of course, the styling is not likely to become obsolete in the foreseeable future. The VW Station Wagon is bound to continue in heavy demand. If you don't believe us, go to a dealer and see if you can buy one off the floor.
Independent Thought
By Steve Carter
January 2001
In the Drive column in Saturday's The Sydney Morning Herald 6 January 2001 it was mentioned that Holden was falsely claiming that the new VL Holden Commodore ute was the world’s first ute with independent rear suspension (IRS). Until now, all the Australian Ford and Holden utes have had a solid rear axle with leaf springs. Subaru have apparently refuted this, saying that the Subaru Brumby in 1978 was in fact the world’s first ute equipped with IRS.
I suppose this statement from Subaru was issued by their Australian distributors (Inchcape Ltd), who until recently were the Australian VW distributors. In which case maybe they should have known better. The VW Type 2 Pickup was in fact the world’s first ute with IRS. The first ones were made in September 1952, and were sold in Australia from 1954. The Kombi’s torsion bar rear, with swing axles and reduction boxes, is fully independent.
Nowadays the later VW ‘double joint’ rear end with four CV joints is described as ‘IRS’, but of course, technically, the earlier swing axle rear ends are IRS too.
I have emailed the columnist Peter Mackay (a very nice fellow who always takes the time to reply) to correct this. He acknowledged VW’s prime position, but also commented that he thought the Austin 1800 ute may have also got the title (nope - that Australia-only version didn't debut until 1968).
Driving the New 1700 VW Commercial
By David Vey
March 2001 (originally published 1972)
I own a 1971 VW Campmobile with the original 60-bhp 1584cc engine, with 18,000 miles on the clock. I was curious to see how much difference the new, optional larger 74-bhp twin carb engine (1679cc) makes, so I borrowed one from my local VW dealer. This engine is optional on all Type 2 VWs except for the Pickup models.
A claimed fuel consumption figure for the new 1700 of 10.4 L/100 km sounded attractive, even though I hardly believed it. After all, the 1972 brochures claim only 11.3 litres for the normal 1600 versions.
Although coaxing the best out of VW Type 2s is enormous fun, one has to accept that vast carrying capacity and reasonable economy do not result in high performance. VW have proved, though, that a very reasonable performance can result. They've done this by offering a detuned version of the 85-bhp engine from the VW 411E.

I collected the Microbus L from the dealer with only 1025 km on the speedo. The only giveaway as to the bigger engine was a larger tailpipe below the Niagara Blue body. The cold engine fired immediately and quickly settled down to a fast burbly tickover.
It was the rush hour, and I had to be patient in the traffic. Here I was forcibly reminded about the automatic cutout fitted on all 1972 Type 2s, with a maximum of about 30, 56 and 93 km/h obtainable in the first three gears. The easily readable and sensibly circular speedo was very fast and gave higher figures. The theoretical top gear figure of 140 is 10 km above the claimed maximum!
The cutout operates at about 5400 rpm, which is some 600 rpm faster than the old 1600cc engine. As the engines use the same gear and final drive ratios, the road speeds obtainable on the intermediate gears with the bigger engine are not much more, but can be reached more quickly.
During the 800 km of my test, I forgot the cutout on second as often as I did on
third. It operates on second gear almost every time one overtakes a laden truck on a hill, when one must decide whether to hesitantly continue at the speed reached in second, or to hope for acceleration in third.
The truth is that the engine revs so very willingly and unobtrusively in its upper ranges and the beautiful butter-smooth gearbox is such a delight to use, that Volkswagen have felt it wise to limit the speed of the engine to protect it and so prolong its life. Otherwise, I am certain that many drivers would constantly be tempted to make full use of the vehicle's accelerative powers on second and third gears.
The fact that it's so easy to reach the maximum permitted revs simply proves that the engine is very well protected and should enjoy the long life expected of VW engines. This is borne out by my having once obtained as an academic exercise 102 km/h in third in my 1600 Campmobile, which has no cutout - nearly 6000 rpm.
Included in the bigger engine option are radial-ply tyres and power assisted brakes. It was difficult to decide at first which were more reassuring. I knew the moment I braked after returning to the Campmobile - the brakes of my own VW seemed ineffectual in comparison and took some getting used to.
The more ordinary brakes call for bigger distances between oneself and the vehicle in front - also for more anticipation. Absence of a protective bonnet in the event of a head-on crash has the same effect and, incidentally, forces one to use the seat belts.
These factors, and the need to use one's own momentum, gearbox and acceleration sense, if one wants reasonable performance, make one a more thoughful and, therefore, better driver. This is one of several reasons why I think Type 2 VWs are such fun to drive.
The radial-ply tyres give one that reassuring feeling on bends of being on tramlines. Where visibility allows, they enable the vehicle to be hustled through bends and to maintain the higher road speeds obtainable with the bigger engine. To illustrate tins, I obtained solo 79 km/h in third on a tight bend with reasonable visibility at the approach to a 1 in 10 hill, up which the Microbus never dropped below 75. The best solo figures in third up the same hill from our 1600 Campmobile have been 70 and 62.
As factory radials were not available when we ordered our Campmobile, I was told that a set of five after delivery would cost $210. So the $279 option for the better engine, tyres and brakes is excellent value. Our 1600’s fat cross-plies give good grip, but they have had to work harder and two were replaced after only 29,000 km. Again it makes good sense to opt for the bigger engine.
Women sometimes complain of difficulty when trying to manoeuvre on radials. So I took the Microbus to the top of a multi-storey whose floor is of the roughest concrete I know. I found parking at several stages was easy, no doubt due to the large and almost horizontal steering wheel - on which one can obtain more pressure - and to a high proportion of the vehicle's weight being over the rear axle.
If any woman reader feels I am being unfair to the fair sex, I suggest she takes her manoeuvres a little more slowly next time she goes shopping!
The rear light clusters for the whole 1972 range have been doubled in size for greater safety. Provision is made for reversing lights, but to have them fitted costs $15. Although this is less than if provision were not made, it is a pity that Volkswagen do not finish the job themselves and make the safer clusters safer still.
The front wheel arches have been slightly enlarged, attractively so but hardly at all where mud collects.
The top halves of 1972 Microbuses can be white, which is sensible, as this is part of a vehicle to reflect most available light in poor visibility. White can be extended below the waistline to make one's vehicle even more visible under such conditions - otherwise there is a choice of Chianti Red, Sierra Yellow or Niagara Blue.
The fuel filler has been reshaped to give more space behind the rear seats. Ensuring a full tank for accurate consumption figures over a mere 800 km was a painfully slow process, but figures over the months should be easier to obtain.
The latter part of my test was almost entirely a very fast main road with four aboard, and produced 12.1 L/100 km. The outward journey was against seemingly gale force winds when the Microbus was twitching excitedly and 100 km/h seemed a prudent maximum.
Coming home the wind had abated but was behind us, and it was possible to maintain high cruising speeds up as well as down the inclines. It is at these speeds that the bigger engine comes into its own, and on good continental roads 110 km/h would become a minimum instead of a maximum. The Microbus was a pleasure to handle.
Acceleration was much improved. The Microbus did 0-80 km/h in 17.5 sec compared with 24.5 for the 1600, and 0-100 in 31.7 (41.5 for the older engine).
Our Campmobile has never been able to exceed 75 km/h up a certain steady main road gradient. It can maintain this speed solo in third. The Microbus was baulked near the bottom of this incline with four on board, but in third soon reached the maximum of 90. It lost speed as soon as I changed into top.
Although one still has to use the gearbox with the bigger-engined vehicle, I gained the impression that most drivers would obtain overall consumption figures better than VW's claim of 12.8 litres.
Both engines run on minimum 95-octane petrol. There was no discernable fall in the engine oil level over 800 km. As we have never had to top up with oil between 5000 km servicings over 165,000 km of VW motoring, this was no surprise.
Replacing Type 4 Kombi push rod tube seals
By Kjell Nelin
June 2002
Does your Kombi embarrass you by belching clouds of smoke at traffic lights? Do perfect strangers tell you that your car is on fire after you park at the supermarket? Well my friend you have the symptoms of the dreaded ‘DRIP’! The cause is oil running out of the engine at the push rod tubes and dripping onto the heat exchangers. This also makes for a very fragrant smelling heating system as well as giving you that nice oily film on the inside of the windscreen after running the defroster!
One of the most common oil leaks experienced by the Kombi Type 4 (twin-carb pancake) engines is at the push rod tube seals. These seals are in fact O-rings. Fortunately for us the Type 4 engines have push rod tubes that are tapered – that is, the inside seal at the case is smaller than the outside seal at the head and can be removed by pulling out through the heads. You can’t do that on a Type 1 (Beetle) engine! I will describe how you can replace these seals with the engine in the car. It is much easier to perform this procedure with the engine out of the car however. If you are pulling the motor for some other reason, a clutch job for example, then you should replace any leaking oil seals at this time. This article also discusses valve adjustment, as this is a necessary part of the procedure.
This job will be much easier if you have trained as a contortionist. All kidding aside, I suggest you tackle this job when there are no pressing time constraints as there will most likely be a few frustrating moments. At those times it helps to remember you will be saving a pretty nice piece of change by doing it yourself!

OK, here's the procedure I use. It's not the only way by any means, however, if changing the seals is the only job at hand, the following procedure is very efficient (this job took me 2 hrs. total the last time I did it, practice does help). Get a set of 8 small and 8 large push rod tube seals and a pair of valve cover gaskets. I do one side first, then the other. This avoids going back and forth.
1. Loosen the lug nuts on both rear wheels.
2. Jack up the driver's side rear and place a jack stand under the torsion tube. Be sure to exercise the usual precautions when working under a suspended vehicle.
3. Remove the wheel and run 2 of the wheel studs back into the hub.
4. Remove the engine air guide plate, the sheet metal piece under the cylinders.
5. Pop off the valve cover retaining wire with a large screwdriver and remove the valve cover (remove the old gasket and clean the surface on the valve cover and head).
6. Place the car in fourth gear with the parking brake off, and use a tyre iron or piece of pipe to rotate the engine to top dead center (TDC) for cylinder #1 (the cylinder # is marked on the top of the engine sheet metal, #1 is the driver's side front). Note that I didn't have you remove the spark plugs. If you are replacing the plugs pull them out and the engine will be easier to turn. To find TDC, pull the cap off the distributor and look for the notch, you will be near TDC for #1 when the rotor is pointing at this notch (assumes the timing is correct). Perfectionists will want to look for the "0" mark on the pulley, I just look at the rotor. This procedure wont work with automatic transmission equipped cars.
7. Now, try to jiggle the rocker arms at #1, both intake and exhaust should have some play, if not, then there is something wrong. Do not proceed until you are confident that you are at TDC for the cylinder you are working on.
8. Remove the wire bale that holds the push rod tubes in place.
9. Next, remove the rocker arm assembly by unbolting the two M7 hex nuts and pulling the assembly out (watch out, there is a spring that will cause it to come apart if you are not careful). This is a good time to inspect the valve adjusting screws, if they are mushroomed or pitted at the ends, replace them (be sure that the new ones have been heat treated, they will be discoloured on the ends). Set the rocker assembly aside.
10. Working with one at a time, pull out the push rod (not always possible, leave it in the tube if necessary) then pop out the push rod tube. They may be hard to get out, if necessary, use a large pair of vise grips, gently clamped onto the outside of the tube, twist from side to side, then push out (not always possible, you have to leave a couple
of them sort of hanging on the head in places).
11. Remove the old O-rings and clean the surfaces on the push rod tube, the case and the head.
12. Put a good coating of engine oil or O-ring grease on the new seals. DO NOT attempt to use any type of silicon gasket sealer or other material, the seals will not work unless they can move freely as the engine expands and contracts during temperature changes! Place the seals on the push rod tube.
13. Carefully line up the tube making sure it is placed properly in the case. Now, gently press the tube into place, you will feel it "pop" into position. I use a spark plug socket and push on the large end of the tube (this works well in those places where the push rod is in the tube as the rod fits up inside the socket). Repeat for the second tube.
14. Install the push rods and replace the rocker arm assembly. This can be tricky. The reason is that the push rods will not automatically seat in the lifters. Here's the trick to make sure they do - with one hand start to insert the rocker assembly onto the mounting studs, at the same time, push down on the ends of both push rods with your other hand as you seat the rocker arms onto the rods, then push the rocker assembly into place. Install the washers and run the nuts on by hand. Check to make sure that you have some free play on the rocker arms at both valves. A tight valve means the push rod did not seat properly! Many a first time engine builder has been buffaloed by this problem! When you are sure the push rods are properly seated use a click type torque wrench to tighten the nuts to 10 ft-lbs.
15. Adjust the valves: set clearance to 0.15 mm (.006") for both valves.
16. Great, one down, three to go! Rotate the engine for TDC #2 cylinder and repeat.
Volkswagen Transporter & Caravelle buyers guide
By Steve Carter
August 2002
The Kombi started the commercial van revolution more than 30 years ago, and while it's been overtaken by Japanese competition, more late, modern derivatives on the second-hand market still offer plenty of innovation, performance and space.
Volkswagen Kombi was the boss of the wash in light commercials in Australia back in the 1960s and 1970s; in 1975 it held over 60% of the 1-tonne market. But it fell from favour as the cost competitive Japanese automakers made big inroads, VW’s Australian factory was sold off and European vehicles skyrocketed in price.
The name ‘Kombi’ is slightly wrong, as only the windowed version with removable seats (‘kombination’) should strictly be called that. The rest are technically delivery vans, or pickups, or Microbuses, not ‘Kombis’. But in Australia (uniquely), the Kombi name has become universal to describe all variations of VW Type 2s.
Though, having said that, unless you really are in love with one of the air-cooled old timers, you really are better off buying one of the latest water-cooled T3 models that were imported from 1984. Indeed, if your budget is generous, the very newest front-drive T4 models, sold from January 1994, are superior in just about every way.
Volkswagen light commercials are a step up on their Japanese counterparts in terms of suspension design. They offer a more comfortable ride and better road holding. They also seem to last longer, though it can be hard to come up with definite numbers as all vans are driven and looked after in different ways. Nonetheless, there is a solid feel about the German vehicles that simply doesn't exist in some competitors. They hold their value well so can be pretty expensive on the used market. On the other hand when it comes time to sell...
The first VW commercials were made in Germany in 1950 and were imported to Australia from 1954. They used modified VW Beetle running gear in a newly-designed unitary body that was extremely strong. They were a hit virtually from the start as there was nothing else in their class. Though fitted with lower gearing than their sedan counterparts, performance was at best adequate.
The ‘second generation’ T2 Kombi, with more space, improved safety, double-joint rear axles, 1600 engine and panoramic windscreen, appeared in 1968. It was the first van to have a ‘Y-frame’ chassis, 20 years before Toyota claimed it for their Tarago. The T2 Kombi was upgraded in 1973 with higher front blinkers, bigger tail lights and better safety. There was also the choice of a bigger Type 4 engine, which went from 1800 to 2000cc in 1976. This was the last Australian-built Kombi, but German imports continued until 1979.
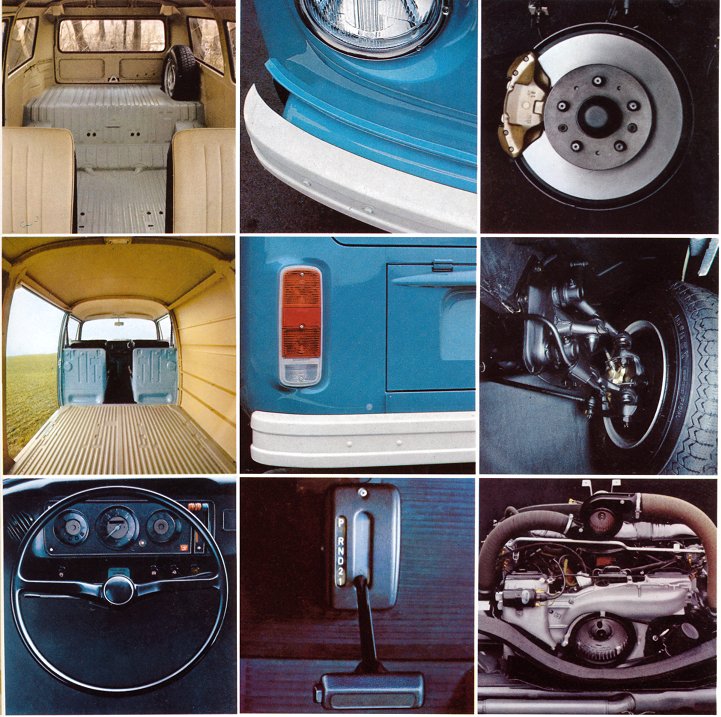
A surprising number of these original Kombis are still on the road, often with their third or fourth engine (and it is probably bigger than the original motor).
The bigger, better and safer ‘third generation’ T3 Kombi was first imported to Australia in 1982, although not in as many variations as the earlier models. The new range was now called the VW ‘Transporter’ for the basic van, or the ‘Caravelle’ for the luxury passenger bus. Initially they had improved hydraulic, fuel injected versions of the ancient 2-litre Type 4 engine. The introduction in 1984 of the 1.9-litre water-cooled ‘wasserboxer’ engine caused a gasp of horror among purists, but the new-fangled model had not only better performance, but also more safety features and was a significant step up in refinement. The T3 was further improved with a bigger 2.1-litre Wasserboxer engine when Ateco became the new local VW importers in 1988. These ones have rectangular headlights.
The T3 Transporter continued to be imported until 1992 (and 1993 for the 4WD syncro version), before being replaced by the completely new front-engine, front-drive T4 in 1994. Again it caused long-time VW aficionados some concern, but they proved very popular. It was able to provide something that the van market demanded, and what previous VW models did not have - a completely flat cargo floor and full-height rear loading. It received a minor facelift and many interior changes in October 1996. Its driving position is more car-like than previously and a standard driver's airbag kept the VW in the forefront of the safety stakes.
T4 factory bodies are single and dual-cab pickups, vans and window vans in several different wheelbase lengths. Cab-chassis versions were sold new with either single or dual cabs, and have now been fitted with a huge range of bodies. We have seen armoured cash-carriers, tuck trucks, garbage tippers and heaps more.
By far the most common variant in the older models nowadays is the Kombi Campmobile. These were constructed when new, either by the VW-appointed contractor (‘Sopru’) or one of half a dozen other companies. The Sopru campers were sold new through VW dealers, and were quite expensive when new. However they have lasted the years well, better looked after than their workhorse van brothers. Over the years they have been bought by families, backpackers and surfies as overnight accommodation; by retired couples doing the long dreamt of around Australia trip, and by those who simply want a car that provides occasional overnight accommodation.
Air-cooled engine capacity started at a minuscule 1200cc in the 1950s and ‘60s, but today there are very few of these still on the road apart from well cared-for ‘classic’ show cars. You are better off with a 1.6, 1.8 or a 2.0-litre second-generation model; as mentioned the larger engines are frequently transplanted into the older models.
Electronic Fuel Injection was fitted to some versions as early as 1976 (to pass ADR pollution laws), but the last imported T2 Kombis went back to carburettors. From 1982, with the T3, all Australian-spec Transporters have had fuel injection. Water-cooled Transporters began with a rear mounted 1.9-litre flat-four in 1984, and this later went up to 2.1 litres.
The latest generation vehicles use Golf-based inline EFI engines, either a 2.0-litre four-cylinder engine or an interesting Audi-derived 2.5-litre five-cylinder unit. These are mounted across the nose of the vehicle in a semi-bonneted style, and drive the front wheels in typical Golf style. An optional five-cylinder, 2.4-litre diesel was offered from 1995. A relatively unrefined unit, it is less economical than some of its competitors, but pulls reasonably well.
Old style VW Kombis used a four-speed floor shift, with a five-speed manual being offered from 1984 with the water-cooled engine. Automatic transmission was on the options list from as far back as 1971. It had three ratios and was far more common on the microbus versions than on the rest of the range. A four-speed automatic was offered from 1989.
With the first three generations up to 1993, VW light commercials used rear wheel drive, since that's where the engine was. From the T4 onwards VW did a complete about-face to front wheel drive. Four-wheel drive was first offered in 1988 on the later T3 models. The ‘syncro’ system was made by Steyr-Puch in Austria and was a sophisticated viscous coupling design. The syncro system was also available on Australian T4 Transporters after 1996.
Strengths: Rugged build. Long lasting. Sophisticated suspension system for excellent handling. Safely features (on models after 1968).
Weakness: Hard to work on for non-VW mechanics. Noisy interior on air-cooled models. Expensive.
Rust can get into the lower areas of the doors, the doorsills and pillars. It is not generally too bad and can be repaired relatively cheaply if caught in time.
Old air-cooled engines are notoriously noisy. If they seem too bad they have to be overhauled, requiring a different technique from conventional engines, but isn't a difficult job for VW workshops. Spare parts are still available for some surprisingly old engines. It is often wise to update the engine while you have it apart. Gearboxes can give problems if the linkages aren't adjusted correctly, or simply because old age has caught up with them. Do the usual check of changing down quickly from third to second and listening and feeling for a crunch. Listen for clunking sounds from the suspension and feel for shock absorbers that are slow damping the vehicle down after hitting a big obstacle.
Competitors include the Ford Econovan, Ford Courier, Holden Shuttle, Mazda B Series, Mazda E Series, Mitsubishi L300 Express, Mitsubishi L200 Express, Mitsubishi Triton, Nissan Urvan, Toyota HiAce. As if !!
The Kruizinwagon
By Kimm Garland
September 2002
It’s been a spare time dream - or was it a dream of spare time - who knows, and who really cares - to make two VW Kombi limos for hire.
If I may rave on a little with some history, back in 1998 when the dream began, I was lucky enough to score a 1972 left-hand-drive deluxe Microbus with a sunroof. This to me at the time was the beginning of the big Kombi limo. I could visualise a left hand drive front half being welded to the rear end of this lefty almost straight away. The left hand side of the left hand drive bus was in a bad state, but I could see the left hand side slider coming from any one of the donors that live here at Indian Automotive.
Much to the horror of my patient wife the project began. Armed with my trusted Oxy and my faithful 9" angle grinder, I started work. After many hours of reading up the latest national guide of federal road safety rules, and regulations regarding this sort of project, we were underway. The T2 Kombi normally has a 2400mm wheelbase, but by now it has been stretched out to 3824mm. The overall length of the two combined Kombis was now 5.9 metres long. Guess who's buying a new garage to house this beautiful stretch.

VW Type 2 vehicles have a full-length, ladder-type frame that provides mounting points for axles, engine and controls. The frame is welded to the all steel unit construction body so that the body and frame together form one rigid assembly. Despite detail variations, this basic design has remained unchanged throughout its production life from 1972 to 1979.
The Microbus, Kombi, Campmobile, Delivery Van and Pickup all share the same frame. The frame consists of two channel-section side-members, a number of cross-members, supports, outriggers and stiffeners- all joined by electric welding. The side-members are approximately 50 x 100 mm in cross section, with a wall thickness of about 2mm. The arched portions of the side-members (located above the axles) are considerably deeper and have welded plates to form a box section. On vehicles with a sliding steel sunroof, Campmobile roof or sliding doors both sides, the body structure is further strengthened by reinforcement plates welded beneath the floor panel.
The seat box, integral with the frame, is built up of sheet steel pressings welded to one another and to the frame side-members. The body floor panels, seat mounting platform, wheel housings, cab rear panel and jacking brackets are welded to the frame in addition to being welded to the front, rear or side panels to the body. This form of construction provides maximum strength with a minimum possibility for leaks and rattles.
The bodies of the Microbus, Kombi, Campmobile and Delivery Van differ only in their window arrangements and trim. The Pickup and Double Cab Pickup bodies employ construction simular to that of fully enclosed models but with an additional spot welded box section strengthening pillars for the cab. Also, the Pickup’s cargo platform is made of ribbed 1-mm steel panels, whereas the floor panels on fully enclosed models are 0.76 and 0.89 thick.
We intend to lengthen the chassis and bodywork of this vehicle without losing any of its integrity, strength or mobility. The 1972 VW Super Deluxe Double Door ‘Kruizinwagon’ is being put together in accordance with the RTA's VSB 5a, 5b and 6 rules and regulations. The bus will be extended by approximately 1424mm within the cargo area. The strengthening of the vehicle will come from the follow areas.
The chassis will be joined as per VSB 6, by cold cutting and welding at 45-degree angles on the rails, welded both side and ground in the direction of the rails and boxed with a C-section for further strength.
The cross members have been replaced with new as per manufactures replacement sections. The top rails (floor supports) have also been replaced with as per manufactures replacement sections.
The out riggers have been replaced with larger sections to accommodate the larger inner and outer sills. The larger inner sill are made from 1.6mm steel and have a stiffener inside for strengthening and run the full length of the cargo area on the inner side of the sill.
The outer sill is made from 0.89mm rolled steel and is in two sections to cover the length of the outer sill. The inner and outer sills have been replaced with larger deeper sections for two reasons. The first being, once a bus is lowered, the castor of the front stub axles cannot be corrected if the bus is lowered too much, causing tyre wear and bump steer. The second reason is for ride comfort. Though we intend using the stiffeners we manufacture for the suspension, we want this big bus to have plenty of suspension travel. So we intend to lower the body down round this bus for that long low look.
Due to the fact of this bus having doors both sides of the vehicle and a factory metal sun roof, the turret will be strengthened by means of stiffening within the inside turret area, being 1.2mm steel stripping running the full length of the turret from the top body line up into the turret area and also around both door jams. Underneath the bus, like on a factory double door bus there will be a full under floor pan running the full length of the cargo area. This will give us maximum strength and will look good to those who get run over by this big long bus.
The interior will seat 6 people, three facing forward and three facing backward and an island bar housing a mini bar, DVD and a flat screen TV. The seating to be used will come from the rear of a Ford LTD and retrimmed to suit the colour scheme of the bus.
The wheels will be 17" alloys with a 45 series tyre all round. The power plant will be a GMH V6 injected motor. The gearbox will be one of our hybrid 2.0-litre long-range transaxles with a hydraulic clutch.
Number two stretch Kombi is a 1960 model double door van, and the work carried out to stretch it will be pretty much the same as the ’72.
An injected Golf 2.0-litre motor, using a Superbug L transaxle with one of our double-joint CV conversions, will power this bus. It will run an adjustable ball joint front end and 1977 style power assisted brakes all round. It will have the same style of interior as the ’72 and will also run the same 17" alloys as the big ‘72, making these two unique buses a beautiful pair of Type 2 limousines.
Contact me at Indian Automotive (02) 4731 6444 if you’d like to see them.
Mike Said's 1978 Kombi
By Mike Said
April 2005
‘Gus’ was purchased in February 2001 from a guy in Newcastle, who was selling him to purchase a Beetle from Ben Durie. Gus had only had two owners, was still wearing his original paint which was important and he had all his logbooks and service records.
As you could expect, the Bus showed plenty of signs of age, but no rust. To bring Gus back to his former glory, a lot of work was required, both mechanically and cosmetically.
After discussion with Leigh Harris, we decided to drive Gus for a couple of months, to see what problems would arise, but we had already decided to repair the mechanicals first. So in April 2001, I sent Gus to Boris at Vintage Vee Dub Supplies. He was there for about a month. He had one burnt valve, the suspension was shot, gear linkages were worn, disc rotors and drums were past it, etc, etc, etc. All the things you could expect for a vehicle of 23 years old.
After getting Gus back, I drove him around for another couple of months, and then decided it was time to continue the restoration project. So I went back to Boris and had him rebuild the gearbox and diff. Gus was now completely mechanically sound. Then the task of finding a reliable panel beater was on in earnest.
By the end of September 2001, I found a panel beater who was prepared to repair Gus’ panels and paint. So with the help of Belinda Godfrey and Leigh Harris, we dismantled Gus to a rolling shell and had a tilt tray pick him up and deliver him for his makeover. His original paint was stripped back to the metal, and all the dents, scars and stone chips were repaired and Gus was repainted. This process took about six weeks. In this time, I went about collecting all the new bits required to put him back together - all new window rubbers, windscreen, tailgate and sliding door rubbers, front and rear light lenses, front emblem etc. Almost as soon as the new paint was dry, he was off to the motor trimmer for a brand new headliner. At this stage, the only items that hadn't been replaced were the outside rear vision mirrors and the engine!! So you know what came next - the engine!!
Again after speaking with Leigh, we decided to take the engine out and rebuild it, but this time Gus' heart would be converted to fuel injection. It was the best decision made. Leigh put the new engine together including the fuel injection system, and Gus received his new heart in December 2002. Gus was put on the dyno, a day organised by Jack Rizzo and the results of that were that Gus had 61 kilowatts at the wheels. In standard form (carbies) you should have approximately 57 kilowatts at the flywheel.
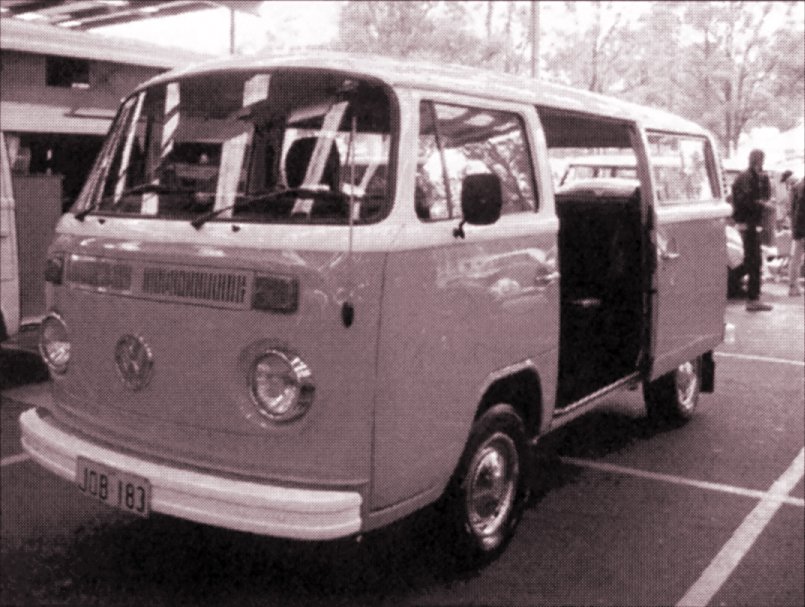
A new back seat (missing from the original Gus) was found at Valla, 2002, bargained for by Dave Birchall and transported back to Sydney by Boris. New interior replacements were sourced by Leigh from Wollongong, and an original rubber floor mat from Wentworthville. Once the mat was installed, a metal trim found in Queensland finished the edge of the sliding door. Ambulance fans from Queensland are the latest find and are in the process of installation.
Since his makeover, Gus has received cosmetic additions in the way of gaol bars, new window tinting, mag wheels, and recovered seats. He has received awards for Best Daily Driven and Best Kombi all years at the 2003 Nationals, which makes me feel pleased to know that all the effort was worth it.
Joe’s Camper
By Joe Buttigieg
February 2006
The ad in the club magazine read: For Sale:- 1973 Volkswagen Dormobile Camper - $6,500. Three weeks before Christmas I went for a drive in my 1973 Cabrio to look at this vehicle. It was such a long drive I almost gave up and turned back home, as I didn't think I would find the place. Lucky I had my mobile phone with me. Kay gave me directions to her home at Yerrinbool. When I finally got to my destination and saw the Kombi, it was worth the trip. I could tell this vehicle had been loved and looked after from day one, it was clean, straight body, no rust, no dents anywhere and everything in it was still original including the floor mats.
Tony and Kay gave me a warm welcome took me in for coffee and cake, and then spent an hour looking over the car and explaining how everything works. The original owners were Bill and Alvia Campbell who bought the Camper brand new in 1973 from Provincial Motors at Liverpool. They sold it to Roy Johnson in 1977 and when he passed away about a year ago, his son Bob sold it to Tony and Kay Fitzpatrick. Although I didn't pay Tony a deposit and someone else went to look at it, Tony was a gentleman. He kept it for me because he wanted this vehicle to go to a ‘good home.’ I picked it up on Christmas Eve, the best Christmas present I ever had.
After Christmas I made contact with the original owner, and to my surprise this sweet 87-year-old lady answered the phone. She was so pleased and happy that her dear old Kombi was still going around after 28 years. On the Monday after New Years day, Mary and I drove the Kombi to Carrs Park to meet Alvia and her daughter Margaret.
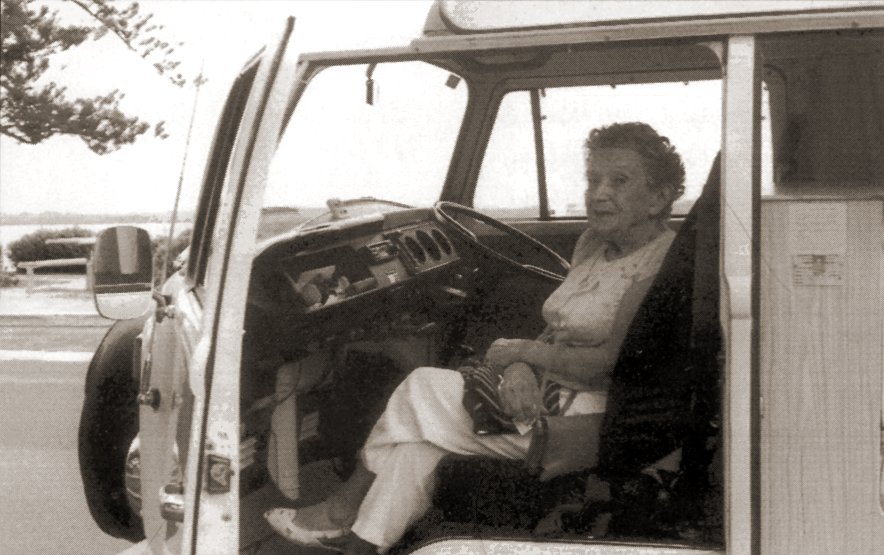
Well you should have seen the joy on their faces; this vehicle brought back so many good memories. They walked around it, looked inside and marvelled how everything was still the same as it was when they sold it in 1977. Alvia told me her husband Bill passed away 15 years ago, he would be 90 now if he was still alive.
She took us into the apartment for a cuppa and they talked about the good times and adventure they had travelling around this country in the Kombi. We went for a drive in the Carrs Park district, Alvia in the front passenger's seat while Margaret kept Mary company in the back seat giving me directions. We stopped for lunch at the bay, took a few pictures and by this time we all become good friends. Alvia said she couldn't wait to ring her two other sons, one in Perth and the other in Tasmania and tell them what a wonderful time she had driving around in the Doormobile.
We'll be calling on Alvia and Margaret again to live them a copy of the Zeitschrift magazine, which will have her picture on the front page. In the meantime I'm looking forward to taking ‘Genny’ (derived from the rego GNY-608) for its first long trip to the Tamworth Country Music Festival.
Last air-cooled VW bus
By Carlos Eslende
February 2006
SÃO PAULO, Brazil - With their unique air-cooled engines sputtering to life, brand-new classic Volkswagen minivans chug off the assembly line after a manufacturing ritual barely changed since hippies turned the boxy vehicle into a counterculture icon. Instead of heading on long, strange trips across Latin America's largest country, these microbuses go straight to work on the streets of Brazil's largest cities for deliveries of all kinds, as ambulances, mobile convenience stores and even troop transports for soldiers.
But this Friday, a long chapter in the history of Volkswagen AG will end when the last air-cooled motor will be hoisted into a vehicle seen as a museum piece almost everywhere else across the planet.
VW is being forced to change the van's historic rear-mounted engine because of a Brazilian emissions law to reduce pollution, which goes into effect in 2006. Production will continue next year, but the van known here as the Kombi will get a new water-cooled engine and a radiator for the first time.
The switch marks the last hurrah for the simple engine developed in the 1930s by famed German engineer Ferdinand Porsche and his key designer, Franz Reimspeiss, their key element of a ‘Volkswagen,’ or ‘People's Car’ that anyone could afford.
The move comes three years after Volkswagen's Mexican division stopped their own production of the van, and churned out the very last original bug sedan with an air-cooled motor.
All told, about 6 million of the vans were built with the air-cooled engine worldwide, adding to the more than 20 million Beetles manufactured.
“It's the end of a very long era,” said Ivan McCutcheon, editor of Britain's VolksWorld magazine for fans of the vans and now out-of-production VW traditional Beetles. “The VW air-cooled engine has been perhaps the greatest-produced engine in numbers the world has seen.” (Wrong. The VW engine is a long way behind the Chevrolet small-block V8, with over 100 million produced since 1955 – Ed).
Volkswagen Brazil says Kombi production is actually expected to increase next year from about 10,000 vans annually to 12,000, because the new engine can run on either petrol or alcohol, widely used as fuel in Brazil, where it costs about half the price of petrol.
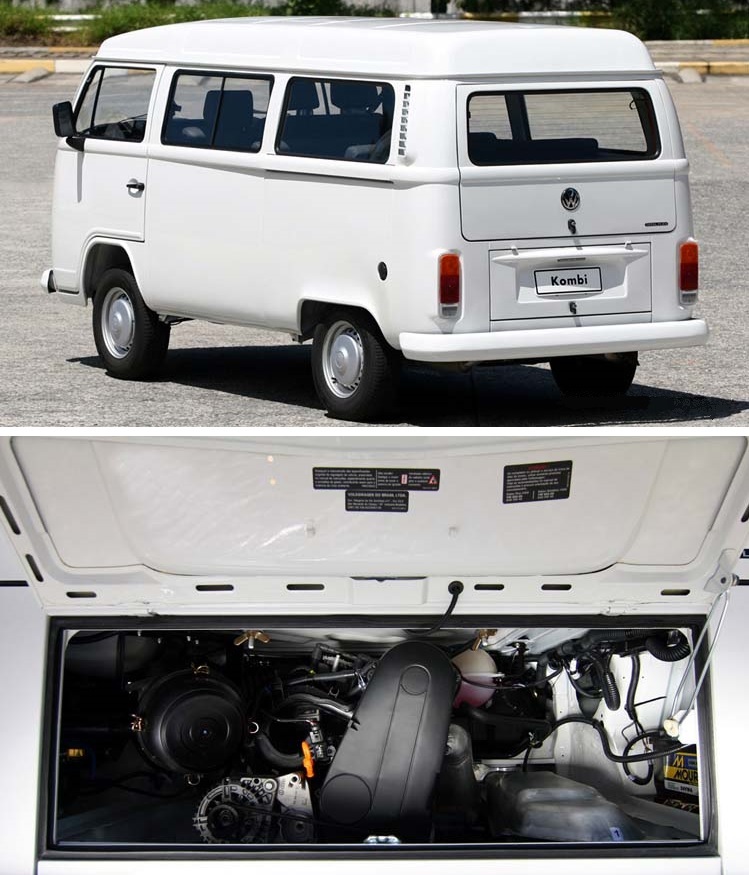
The body of the van won't change, however, and Volkswagen's São Paulo factory will churn out Kombis in keeping with tradition, minus the high-tech robots that do most of the work in modern car factories.
The Kombi is made by workers who shove the windows into place by hand, use mallets to tap out imperfections in the vehicle's body and do a final quality check on the doors by slamming them while listening to make sure they sound right.
Volkswagen isn't concerned about losing market share with the new engine because executives believe the vehicle still has several advantages the competition can't match: A list price of about $15,400 and capacity to carry a metric ton of goods.
Although the liquid-cooled engine could technically handle air conditioning, there are no plans to list it as an option. Brazilian Kombi buyers, market research shows, wouldn't pay the extra cost. It will have a little more power, with a top speed of 130 km/h, as opposed to the 120 km/h maximum with the air-cooled engine.
“There's just no cheaper way to transport a ton of cargo,” said Hans-Cristian Maergner, president of VW's Brazilian division.
The new engine is a derivative of the 1.4-litre in-line four used in the VW Fox and Polo models. It is 1390cc in size, and the cylinder head has just two valves per cylinder but a compression ratio of 11:1 for alcohol fuel. It has multi-point sequential fuel injection, which enables it to produce 60 kW at 4800 rpm on alcohol, and 58 kW on petrol.
Leigh & Belinda's 1977 Deluxe Microbus
By Leigh Harris
May 2006
Complete in every way, this bus was a rare find that Belinda stumbled across. Originally owned by a gentleman who resided in Gosford, this bus was bought new from the dealership and remained a one-owner bus until sold in late 2004 to the second owner, who we bought this bus from. The second owner drove this bus for 13 months before having to resell it to us due to the owner being pregnant and unable to climb up behind the steering wheel.
In the time we have owned it very little has needed to be done. The trip meter speedometer needed to be replaced, the rear jail bars have been polished, new mud flaps and a security immobilizer installed, all CV joints have been cleaned, and axles painted and reassembled. Unfortunately the fuel tank sender stopped working (common problem with this model) so the engine had to be dropped down to remove the fuel tank. At the same time the fuel tank was replaced with an EFI unit in preparation for a possible upgrade to fuel injection in the near future. The fuel tank cover has been repainted black in POR15. And the later model radio that came with the car was replaced with an original unit to restore the vehicle back to factory specifications (although there’s a hidden modern stereo).
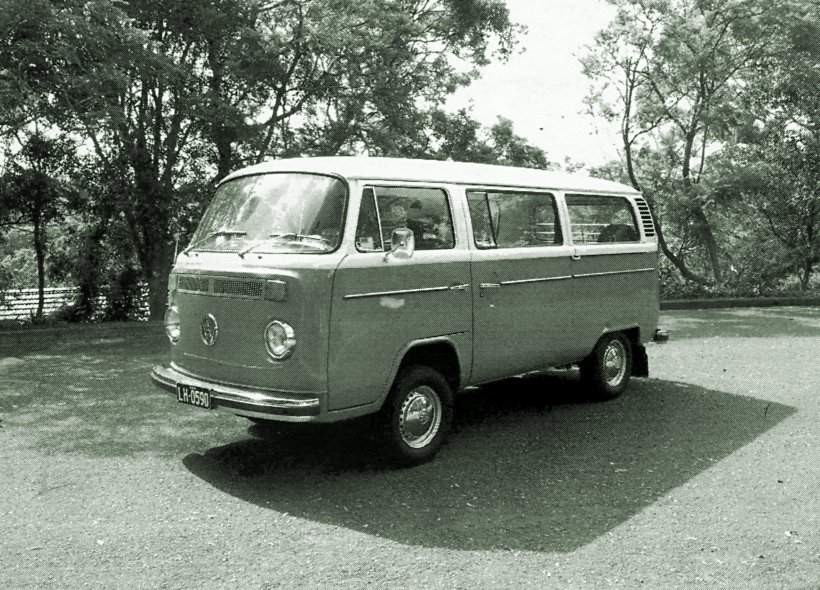
The Microbus is in such original and factory condition that not much has needed to be done, it drives, shifts and handles like a new vehicle. Just as the two previous owners have done we have simply garaged and cared for the vehicle without mistreatment. The motor is serviced like clockwork every 6 months or 5000 kilometres. But 6 months always comes first with only 4000 km being added to the clock in the past 18 months.
The previous owner told us when they bought the vehicle they took it up over the border into Queensland on a holiday and rang the original owner from up there to tell him where they were. The original owner was reported to be in shock at the news having never driven the vehicle out of his own district in his 27 years of ownership since new.